
Breakfast & Brunch
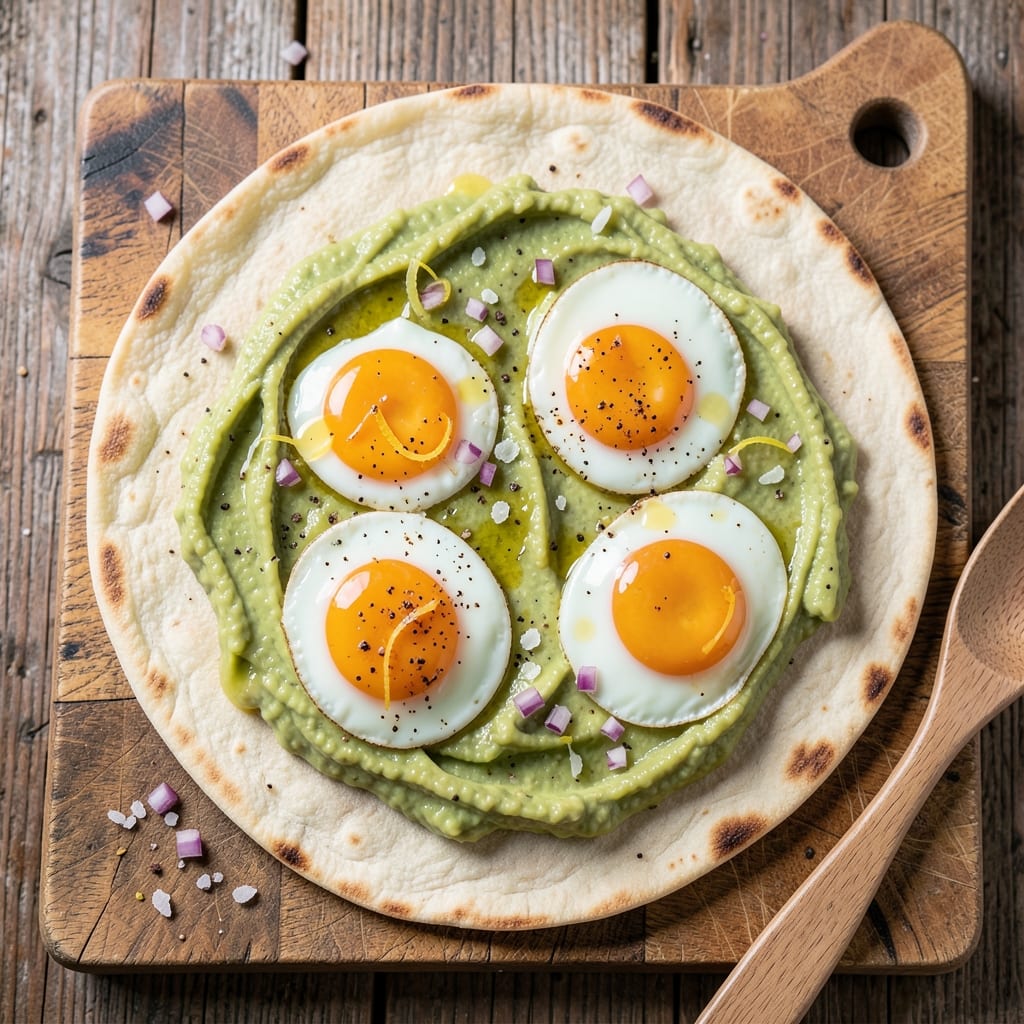
This avocado egg wrap recipe transforms breakfast into a crispy, creamy masterpiece that balances rich yolk magic with cool avocado texture. The secret lies in perfectly crisped tortillas that hold together while cradling tender eggs and velvety avocado—no soggy wrappers here. I developed this after years of struggling with flimsy wraps that fell apart, and this method guarantees structural integrity every time.
What sets this recipe apart is the two-step tortilla technique: lightly toasting until just crispy, then warming again after filling to maintain that satisfying crunch. The eggs cook to your preferred doneness—silky scrambled, runny fried, or delicate poached—while the avocado stays fresh and spreadable. Optional toppings like pepper jack cheese, microgreens, and chili flakes add layers of flavor without overwhelming the dish.
By the time you roll it up, you'll have a wrap that's crisp on the outside, creamy on the inside, and packed with textures that make every bite satisfying. The tortilla's structure holds up even when sliced, making it perfect for meal prep or sharing. This isn't just breakfast—it's a handheld culinary experience that delivers restaurant-quality results at home.
The beauty of this recipe is its adaptability. Use it as a quick weekday breakfast, a brunch centerpiece, or even a light lunch option. With just a few simple ingredients and precise techniques, you'll create a dish that's as impressive to look at as it is delicious to eat. Let's get started on making your perfect wrap.
Ingredients for avocado egg wrap
Four crispy tortillas, velvety avocado, and silky eggs—your perfect handheld breakfast awaits.
| Ingredient | Amount | Notes |
|---|---|---|
| Large Flour Tortillas 🌯 | 4 whole | 8-inch size, low-carb if preferred |
| Ripe Avocados 🥑 | 1 whole | Hass variety, slightly soft |
| Large Eggs 🥚 | 4 whole | Fresh, room temperature |
| Unsalted Butter 🧈 | 2 tbsp | For tortilla crisping |
| Extra-Virgin Olive Oil 🫒 | 1 tbsp | For egg cooking |
| Lemon Juice 🍋 | 1 tbsp | Freshly squeezed |
| Salt 🧂 | ½ tsp | Diamond Crystal preferred |
| Black Pepper 🌶️ | ¼ tsp | Freshly ground |
| Pepper Jack Cheese 🧀 | ½ cup | Shredded, optional |
| Microgreens 🌱 | ¼ cup | Pea shoots or sprouts |
| Chili Flakes 🔥 | ½ tsp | Adjust to taste |
| Sour Cream 🥛 | ¼ cup | Full-fat for creaminess |
| Cilantro Leaves 🌿 | ¼ cup | Chopped, optional |
The tortillas are the foundation, so grab Mission brand if you can—thinner than most and holds up best to crisping. Look for the low-carb option if you want to cut calories without sacrificing texture. Ripe avocados are non-negotiable here; they should yield slightly when pressed but not be mushy. I always grab Hass avocados from the store's produce section—avoid the pre-cut ones unless you're eating immediately. For the eggs, freshness matters—they should float in cold water if you're testing at home. The butter should be unsalted so you control the seasoning, and trust me on the full-fat version for that perfect crisp.
No pepper jack? Sharp cheddar works just as well—just shred it yourself for that perfect melt. Short on microgreens? Baby spinach or arugula in a pinch, though they wilt more when warmed. The chili flakes can be swapped for crushed red pepper if you prefer a smoother heat. For the sour cream, Kroger's brand is my go-to—it's thick and tangy without being overly sour. If you're making these ahead, skip the sour cream until serving to prevent sogginess. The cilantro is totally optional but adds that fresh finish—just chop it right before serving so it stays vibrant.
Store the tortillas in a paper bag at room temp for up to 3 days—they crisp best when fresh. Avocados stay good for 2 days in the fridge once cut, so prep them last. The cooked eggs hold for 1 day in the fridge, but the tortillas lose crispness overnight, so I recommend assembling and eating immediately. These reheat beautifully in a skillet over medium heat for about 30 seconds per side—just enough to warm through without making the tortilla soggy. Freezing isn't ideal for the tortillas, but you can freeze the filling components separately for up to 1 month.
Why You'll Love This Recipe
- Five-Ingredient Magic: I swear by this recipe when I’m staring into the fridge wondering what to eat. Three ingredients max if you skip the butter—just tortillas, avocado, and eggs. That’s it. The butter makes it rich, but honestly? You can wing it with olive oil and still get that golden, buttery finish.
- Creamy Crispy Contrast: The secret’s in the eggs—runny yolks pool into the avocado’s buttery mash while the edges crisp just enough to hold the wrap together. No soggy mess here. It’s like a breakfast taco and avocado toast had a delicious, high-protein baby.
- Lunchbox Superstar: Between us, this is my go-to for packed lunches. Wrap it in foil, toss it in a bag, and it stays fresh for days. My kids (and my husband) actually eat their greens this way—no complaints about "yucky healthy food."
- Budget Breakfast Boost: A dozen eggs and a couple avocados feed my family for days. I make a batch of wraps on Sunday, and by Wednesday, I’m still finding them tucked in the fridge. Plus, flour tortillas? Cheap. This recipe turns $10 into five satisfying meals—no takeout needed.
Step-by-step instructions for avocado egg wraps
Here's how to craft perfectly crispy tortillas and silky egg centers every time.
Prep the Avocado Filling and Warm the Tortillas
Start by halving the whole ripe avocado and scooping the flesh into a medium bowl. Mash it with a fork until smooth, then stir in the 1 tablespoon lemon juice, 0.5 teaspoon salt, and 0.25 teaspoon black pepper. This acidity prevents browning and brightens the flavor. Set aside while you work on the tortillas.
Heat a clean skillet over medium heat and add the 2 tablespoons unsalted butter. Once melted and foaming, place each large flour tortilla in the pan one at a time. Press down gently with a spatula for 30 seconds until the tortilla softens slightly but doesn't brown. Flip and repeat on the other side. These warm, pliable tortillas are key to that crispy-yet-flexible texture we're after.
Cook the Perfect Runny Eggs
In a separate nonstick skillet, heat the 1 tablespoon extra-virgin olive oil over medium-low heat. Crack each large egg into a small bowl first—this prevents overcrowding and ensures even cooking. Once the oil shimmers, slide an egg into the pan. Cook for 2-3 minutes until the whites are just set but the yolk remains completely runny. Transfer to a plate and repeat with remaining eggs. The high heat of the tortillas will finish cooking them slightly when wrapped.
Here's the thing—you want that yolk to stay liquidy. If you see it starting to thicken too soon, lower the heat immediately. The contrast of warm tortilla and silky yolk is what makes these wraps so irresistible.
Assemble the Wraps with Perfect Layering
Spread about 2 tablespoons of the avocado mixture onto each warm tortilla, leaving a ½-inch border around the edges. Sprinkle 2 tablespoons of the pepper jack cheese evenly over the avocado, then place one egg in the center. Drizzle with 1 teaspoon sour cream and 1 teaspoon chopped cilantro leaves, then fold the bottom third of the tortilla up, followed by the sides. Roll tightly from the bottom, tucking in any fillings that escape.
Don't overstuff—these wraps should be snug but not bursting. The cheese will melt slightly from the residual heat, creating that perfect gooey texture when you take your first bite. If the tortilla feels too soft to handle, let it sit for 1 minute before rolling to firm up.
Finish with Fresh Toppings and Crispy Edges
Transfer each assembled wrap to a plate and immediately top with 1 tablespoon microgreens and a pinch of chili flakes. The microgreens add a peppery crunch that cuts through the richness of the eggs and cheese. For that final crispy touch, return the wraps to the skillet over medium heat for 1-2 minutes per side until golden brown spots appear on the tortilla.
Serve immediately while the tortillas are still warm and the yolk remains perfectly runny. The contrast of crispy edges, creamy avocado, and silky egg is what makes these wraps so addictive. If you're feeling fancy, serve with a side of extra chili flakes or a squeeze of lime for brightness.
Pro Tips For Making Avocado Egg Wrap
- Warm the Tortillas: Cold flour tortillas crack like brittle chips when you fold them—no one wants that. Heat them for 10-15 seconds per side in a dry skillet over medium heat (or wrap in a damp towel and microwave for 20 seconds). The slight char on the edges adds texture, and they’ll hold together like they’re supposed to.
- Mash Avocados First: Sliced avocado oxidizes fast and turns to mush in the wrap. Scoop the flesh into a bowl, mash it lightly with a fork, and mix in a squeeze of lime juice and a pinch of salt. This keeps it creamy, prevents soggy tortillas, and makes spreading way easier—no more wrestling with slippery chunks.
- Cook Eggs Low and Slow: High heat scrambles eggs into rubbery clumps. Use a nonstick skillet over low-medium heat, melt 1 tablespoon of butter, then cook the eggs gently, stirring every 10 seconds until just set. You want soft, tender curds that won’t turn the wrap into a greasy mess.
- Butter the Skillet Properly: A dry skillet = eggs sticking like glue. Melt 1 tablespoon of unsalted butter in the pan until it foams, then wipe out the excess with a paper towel—just enough to coat. This gives the eggs a golden crust without drowning the wrap in fat. (Yes, even if you’re using olive oil for the avocado, butter here makes a difference.)
Pro cooking tips for avocado egg wrap
Tortilla Crispy Perfection
For that restaurant-quality crunch, I swear by the two-step tortilla method. First, warm each tortilla in a dry skillet over medium heat for just 10 seconds per side—this softens them slightly without browning. Then, after filling, give them a final 30-second crisp in the same skillet with ½ teaspoon butter per wrap. This two-stage approach ensures they stay pliable enough to roll but develop that satisfying crunch when served. 🌯
Egg Doneness Control
Runny yolks are non-negotiable here, so I use a nonstick skillet and medium-low heat to cook the eggs. For perfect results, crack each egg into a small bowl first—this prevents overcrowding and ensures even cooking. The whites should set in 2-3 minutes, but the yolk must remain completely liquid. If you prefer firmer eggs, cook them to 145°F internal temperature instead. The residual heat from the tortilla will gently finish them during assembly.
Avocado Prep Secrets
Ripe avocados are essential, but the real trick is acidity control. Mash the avocado with 1 tablespoon lemon juice and ½ teaspoon salt to prevent browning and enhance flavor. For extra creaminess, add 1 teaspoon sour cream directly to the avocado mixture. If your avocados are too firm, let them sit at room temperature for 15 minutes before mashing—they'll yield more smoothly. Store any unused avocado mixture in an airtight container with plastic wrap pressed directly on the surface to minimize oxidation.
Cheese Melting Magic
Pepper jack cheese is my go-to for its mild heat and creamy melt, but sharp cheddar works just as well. The key is to sprinkle it evenly over the avocado before adding the egg. When you roll the wrap, the cheese will melt slightly from the tortilla's residual heat, creating that gooey texture that ties everything together. For extra richness, add 1 teaspoon sour cream to the cheese layer before rolling—it adds a tangy contrast to the creamy avocado and eggs. 🧀
Assembly Without the Mess
Here's my pro tip: Work quickly but deliberately. Spread the avocado within ½ inch of the tortilla edges to prevent leaks. When rolling, fold the bottom third up first, then the sides, and finally the top. This burrito-style fold creates a tight seal that holds up even when sliced. If your wrap feels too soft to handle, let it rest for 1 minute before finalizing the roll—the tortilla will firm up enough to stay together. For meal prep, assemble and wrap individually in parchment paper before refrigerating.
Final Crisping Trick
For that golden, crispy finish, return the assembled wraps to the skillet over medium heat for 1-2 minutes per side. This final crisping step is what elevates these from good to restaurant-worthy. If you're short on time, use a toaster oven at 375°F for 2-3 minutes—it gives the same effect without risking overcooking. Serve immediately while the tortillas are still crisp and the yolk remains silky. The contrast of textures is what makes this dish truly special. 🔥
Nutrition facts
Frequently asked questions
Can I make these avocado egg wraps ahead of time?
Assemble them completely but skip the final crisping step. Store wrapped in parchment paper in the fridge for up to 4 hours. When ready to serve, warm in a skillet over medium heat for 1-2 minutes per side until crispy again. The avocado will stay fresh and the tortilla will regain its crunch. Just avoid adding toppings until serving to prevent sogginess.
What if my tortillas get soggy when I add the filling? This happens when the tortillas aren't warm enough. First,
Can I substitute the eggs for another protein?
Try crumbled bacon (cook until crispy), shredded rotisserie chicken, or black beans for a vegetarian option. For texture contrast, use ½ cup cooked protein instead of one egg. If using beans, warm them with a pinch of cumin for extra flavor. The key is keeping the filling moist enough to prevent dry tortillas—so adjust toppings accordingly.
How do I prevent the avocado from turning brown?
Acidity is your best friend! Always mash the avocado with 1 tablespoon lemon juice and ½ teaspoon salt. For extra protection, press plastic wrap directly on the surface before sealing the container. If you're prepping ahead, store the avocado mixture in an airtight container and keep it refrigerated. The lemon juice slows oxidation, but for best results, use the avocado within 2 days of mashing.
Can I make these wraps gluten-free?
Yes! Use gluten-free flour tortillas (like Mission or Siete brands) and check that all toppings are certified GF. For extra crispiness, brush the tortillas with olive oil before warming in the skillet. The texture will be slightly different but still delicious. If you're avoiding gluten entirely, you could also try large lettuce leaves as a wrap alternative—just add a drizzle of olive oil to crisp them lightly.