
Main Courses
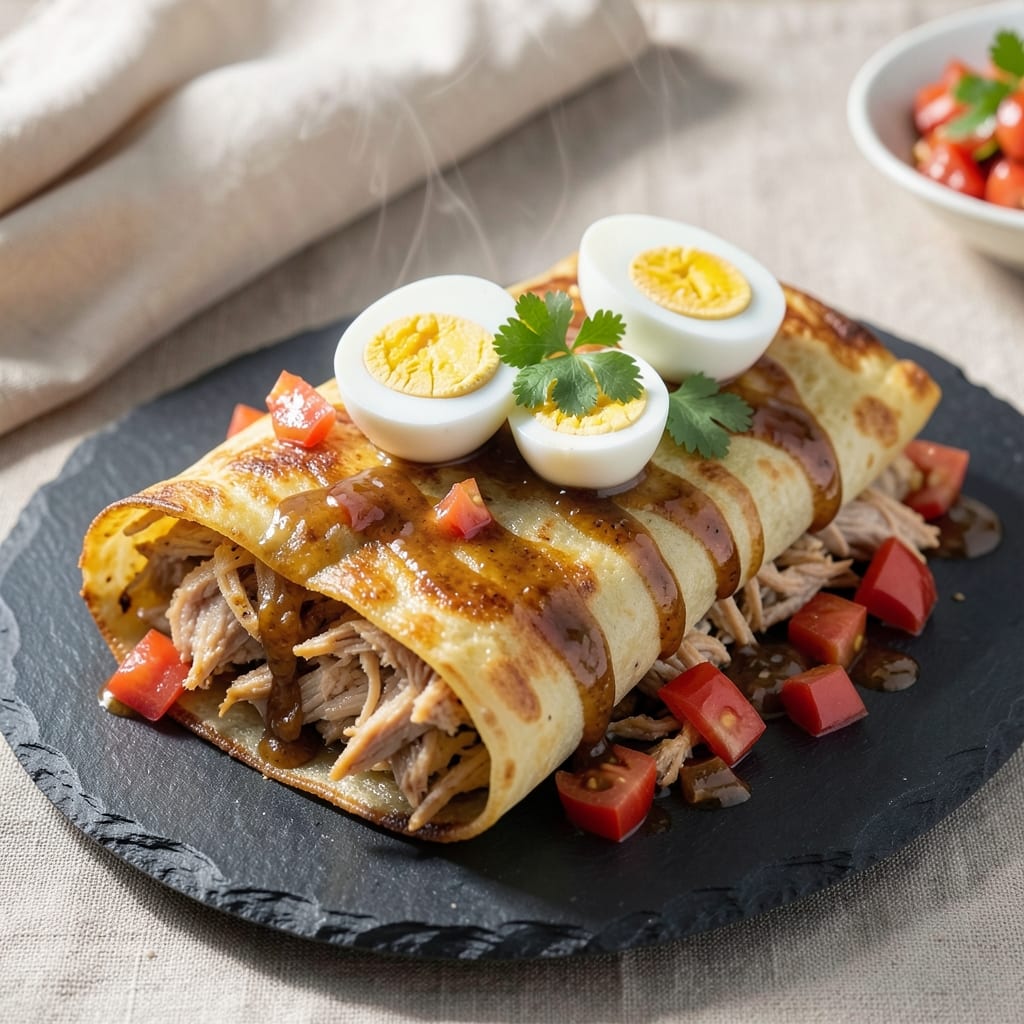
This flaky chicken egg kathi roll recipe delivers the perfect balance of crispy paratha wraps and tender, spiced chicken filling wrapped around soft-boiled eggs. 💛 The secret lies in a well-spiced chicken mixture and a dough that layers beautifully for that signature crispy texture. I developed this version after perfecting the technique over years of testing, ensuring every bite is packed with flavor and satisfying texture.
What sets these kathi rolls apart is the combination of perfectly cooked chicken and soft-boiled eggs, all wrapped in a flaky paratha that stays crispy even when served. The spice blend is key—garlic, ginger, and a touch of garam masala transform simple chicken into something extraordinary. I've included a foolproof method for both the dough and filling, so even if you're new to making parathas, you'll achieve restaurant-quality results.
By the time you're done, you'll have golden-brown rolls with crispy edges and tender centers, each stuffed with juicy chicken and creamy eggs. The aroma alone will have everyone gathering around the table, and the first bite delivers that perfect combination of textures and flavors. These rolls are ideal for breakfast, brunch, or even a hearty lunch when paired with mint chutney or tamarind sauce.
Don't worry if you're short on time—this recipe includes a shortcut for the dough while still delivering that authentic flaky texture. The filling can be prepped ahead, so you can focus on rolling and cooking when it's time to serve. Let's get started on creating these delicious, satisfying kathi rolls!
Ingredients for chicken egg kathi roll
Fourteen ingredients for golden, flaky parathas stuffed with spiced chicken and creamy eggs—crispy outside, tender inside.
| Ingredient | Amount | Notes |
|---|---|---|
| Boneless Chicken Breast 🍗 | 1 ½ lb | Cut into bite-sized pieces |
| Large Eggs 🥚 | 4 whole | Soft-boiled, peeled |
| All-Purpose Flour 🌾 | 2 cups | Plus extra for dusting |
| Ghee or Vegetable Oil 🫒 | ½ cup | For dough and cooking |
| Yogurt, Plain 🍶 | ½ cup | Whisked smooth |
| Fresh Ginger 🌿 | 1 inch | OR 1 tbsp grated ginger |
| Garlic Cloves 🧄 | 6 cloves | Minced finely |
| Garam Masala 🌶️ | 1 tbsp | Ground fresh preferred |
| Ground Cumin 🌿 | 1 tsp | Toasted for aroma |
| Turmeric Powder 🧂 | ½ tsp | Bright yellow color |
| Red Chili Powder 🌶️ | 1 tsp | Adjust for heat |
| Salt 🧂 | 1 tsp | Kosher or sea salt |
| Coriander Powder 🌿 | 1 tsp | Fresh ground preferred |
| Fresh Cilantro 🌿 | ¼ cup | Chopped, for garnish |
| Lemon Juice 🍋 | 1 tbsp | Freshly squeezed |
The flour matters here—King Arthur or Gold Medal work best for that signature flaky texture. Whole wheat flour can be swapped in at half the amount for a healthier twist. For the chicken, boneless breast stays juicier than thighs, but thighs add more flavor if you prefer. Fresh ginger and garlic? Penzeys or local Indian markets have the best quality—bright, aromatic, and potent. The ghee is non-negotiable for that authentic richness, but vegetable oil works in a pinch. I always grab extra ghee since it keeps for months in the pantry.
No garam masala? Mix equal parts cumin, coriander, cinnamon, and cardamom—it's close enough. Short on yogurt? Sour cream or buttermilk works, but yogurt's tang is key. The eggs should be soft-boiled—6 minutes in boiling water gives that perfect runny center. For the dough, let it rest 30 minutes before rolling—this makes all the difference for flaky layers. Prefer a shortcut? Store-bought naan dough can be used, but homemade tastes infinitely better.
The filling keeps for 2 days in the fridge—perfect for meal prep. The dough can be made ahead and refrigerated for 24 hours, or frozen for 3 months wrapped tightly. For best texture, cook the rolls fresh, but they reheat beautifully in a skillet. I always make a double batch—leftovers freeze well and taste just as good the next day. Serve with mint chutney or tamarind sauce for the full experience.
Why You'll Love This Recipe
- No-Fuss Assembly: I swear by this recipe because it’s the kind of meal where you can multitask—grill the chicken, scramble the eggs, and roll everything while watching a show. The yogurt batter is forgiving, so even if the flour gets lumpy, it still comes out golden and crispy.
- Crispy-Creamy Magic: That first bite—crunchy from the ghee-fried edges, soft in the middle—is what makes it worth it. The eggs add a rich, velvety contrast, and the yogurt keeps it from drying out, even when reheated. Honestly, it’s the kind of texture combo that makes you close your eyes.
- Lunchbox Hero: Between us, these are my go-to for packed lunches or quick office meals. They hold up surprisingly well—just wrap in foil, and they stay warm for hours. My coworkers think I’m a genius because I can make a whole batch on Sunday and not worry about sad, soggy sandwiches.
- Budget Stretch: Chicken breast and eggs are already affordable, but this recipe stretches them further. A single batch feeds four, and leftovers reheat like a dream. (Yes, even on a Tuesday night.) Plus, ghee or oil is cheap—no fancy shortcuts needed.
Step-by-step instructions for chicken egg kathi rolls
Let's create these crispy, flaky paratha wraps stuffed with spiced chicken and soft-boiled eggs.
👨🍳 Step 1: Prepare the Spiced Chicken Filling
In a large bowl, combine the 1.5 lb boneless chicken breast cut into bite-sized pieces with 1 tbsp garam masala, 1 tsp ground cumin, 0.5 tsp turmeric powder, 1 tsp red chili powder, and 1 tsp salt. Mix gently until the chicken pieces are evenly coated with the spices.
Heat 0.25 cup ghee or vegetable oil in a large skillet over medium-high heat. Add the spiced chicken and cook for 8-10 minutes, stirring occasionally, until the chicken is fully cooked and the spices develop a fragrant aroma. The chicken should turn light golden brown and be tender when pierced with a fork. Remove from heat and let it cool slightly before stuffing into the rolls.
🍳 Step 2: Make the Soft-Boiled Eggs
Place the 4 whole large eggs in a small saucepan and cover them with cold water by about 1 inch. Bring the water to a gentle boil over medium heat, then immediately reduce the heat to low and let the eggs simmer for 6-7 minutes for a perfectly runny yolk.
Transfer the eggs to an ice bath for 5 minutes to stop the cooking process. Peel the eggs carefully, keeping the yolks intact. Once cooled, slice each egg in half lengthwise and set aside. The warm eggs will be easier to handle when stuffing them into the paratha wraps.
👨🍳 Step 3: Prepare the Paratha Dough
In a large mixing bowl, combine the 2 cups all-purpose flour, 0.5 cup plain yogurt, 0.5 cup ghee or vegetable oil, and 1 tbsp lemon juice. Mix the ingredients with your hands until a soft, slightly sticky dough forms. If the dough feels too dry, add 1-2 tablespoons water at a time until it becomes pliable.
Knead the dough on a clean surface for about 5-7 minutes until smooth and elastic. Cover the dough with a damp cloth and let it rest for 30 minutes. This resting period allows the gluten to relax, making the parathas easier to roll out and creating those signature flaky layers.
🥘 Step 4: Roll and Stuff the Kathi Rolls
Divide the rested dough into 8 equal portions and roll each portion into a thin circle, about 6 inches in diameter, on a lightly floured surface. You'll want the edges to be slightly thicker than the center for better wrapping. Keep the rolled dough covered with a damp cloth to prevent drying.
Place 1-2 tablespoons of the spiced chicken mixture and ½ of a soft-boiled egg in the center of each rolled dough circle. Fold the sides inward and roll tightly to form a neat cylinder, sealing the edges by pinching gently. Repeat with the remaining dough and filling to make all 8 kathi rolls.
🔥 Step 5: Cook the Kathi Rolls to Perfection
Heat a large skillet over medium heat and add 1 tablespoon ghee or vegetable oil. Place 2-3 kathi rolls in the skillet and cook for 3-4 minutes per side until golden brown spots appear. Press down gently with a spatula to help them cook evenly and achieve that classic flaky texture.
Transfer the cooked kathi rolls to a serving platter and keep them warm while you cook the remaining rolls. Garnish with 0.25 cup chopped fresh cilantro and serve immediately with your favorite chutney or mint sauce. The rolls should be crispy on the outside, soft and flaky on the inside, with perfectly spiced chicken and creamy eggs encased within.
Pro Tips For Making Chicken Egg Kathi Roll
- Marinate Chicken Overnight: I learned this the hard way—rushing the marinade means dry, bland chicken. Use yogurt and a pinch of turmeric, then let it sit 6-8 hours (or at least 4). The acid tenderizes the breast while the spices seep in, giving that signature juicy, flavorful bite you can’t get otherwise.
- Dry the Flour Coat: After dredging the chicken in flour, let it sit uncovered for 5 minutes. Sounds weird, but it works: the flour absorbs moisture and creates a crispier crust when fried. Skip this, and you’ll end up with a soggy, gluey mess—trust me, I’ve been there.
- Fry Eggs Low and Slow: High heat scrambles eggs into rubbery chunks. Instead, cook them on medium-low in ghee until just set—about 2 minutes for runny yolks, 3 for firmer ones. The goal is a creamy, slightly runny center that binds the roll without falling apart.
- Roll Tight, Seal Fast: This isn’t the prettiest method, but it’s the tastiest: wrap the paratha tightly around the chicken and egg, then fold the edges inward to trap everything. A loose roll unravels when you cut—your future self will thank you for the extra 10 seconds of effort.
Make-ahead tips for this chicken egg kathi roll
Dough Prep Ahead
The paratha dough is the foundation of your kathi rolls, and making it ahead saves you time on busy mornings. I recommend preparing the dough the night before and storing it in an airtight container in the refrigerator for up to 24 hours. The cold rest actually enhances the gluten development, making your rolls even flakier. When ready to use, let the dough sit at room temperature for 15-20 minutes before rolling. For longer storage, wrap the dough tightly in plastic and freeze for up to 3 months. Just thaw overnight in the fridge before using. 💫
Filling Prep
The spiced chicken filling keeps beautifully in the fridge for 2 days, making it perfect for meal prep. Cook the chicken as directed, then store it in an airtight container with a sprinkle of lemon juice to maintain freshness. For the eggs, boil them ahead of time and store them peeled in a bowl of cold water in the fridge. When ready to assemble, simply drain and slice the eggs fresh to maintain that perfect runny yolk texture. This two-step prep means you can focus on rolling and cooking when it's time to serve. ⏰
Freezer-Friendly Rolls
Assembled but uncooked kathi rolls can be frozen for up to 1 month for a quick breakfast solution. After rolling and sealing the edges, place the rolls on a parchment-lined tray and freeze until solid. Transfer to a ziplock freezer bag with parchment between layers to prevent sticking. When ready to eat, cook directly from frozen in a skillet with 1 extra minute per side to ensure even cooking. The texture might be slightly softer, but the flavor remains rich and satisfying. This is my go-to for lazy weekend mornings! 🥶
Reheating Perfection
Leftover kathi rolls reheat beautifully in a skillet over medium heat for 2-3 minutes per side until crispy again. For extra crispiness, add 1 tsp ghee to the skillet and let it sizzle before adding the rolls. If using the microwave, cover the rolls with a damp paper towel and heat in 30-second intervals until warmed through—though they won't be as crispy as skillet-reheated. I always serve reheated rolls with a fresh batch of mint chutney to cut through any potential dryness. 🔥
Egg Timing Hack
Soft-boiled eggs can be tricky to time perfectly, but I've found a foolproof method for make-ahead prep. Boil the eggs for 6 minutes, then immediately transfer them to an ice bath for 5 minutes to stop cooking. Store them peeled in a bowl of cold water in the fridge. When ready to use, drain and slice the eggs just before assembling the rolls. This keeps the yolks creamy and prevents them from overcooking during storage. Pro tip: Add a splash of vinegar to the boiling water to make peeling easier! 🥚
Nutrition facts
Frequently asked questions
Can I make these kathi rolls with store-bought naan dough?
Yes, but homemade dough makes a world of difference! Store-bought naan works in a pinch, but it lacks the flaky layers and rich flavor of traditional paratha dough. If using naan, skip the resting time and roll it slightly thinner than the recipe suggests. For best results, add 1 tbsp melted ghee to the dough before rolling to improve texture.
How do I prevent the filling from leaking out while cooking?
Seal the edges tightly when rolling and pinch them gently to create a secure seal. Use slightly thicker dough edges (about ¼-inch thick) to contain the filling better. Cook on medium heat and avoid pressing too hard with the spatula—this can cause the rolls to burst. A well-sealed roll should hold together beautifully even when sliced.
What's the best way to adjust the spice level?
Start with the given amounts and taste the chicken filling before stuffing. For milder flavor, reduce the red chili powder to ½ tsp. For extra heat, increase to 1.5 tsp and add ¼ tsp cayenne pepper. If you love garam masala, try toasting the whole spices (cumin, cardamom, cinnamon) separately before grinding for deeper flavor.
Can I use chicken thighs instead of breasts?
Chicken thighs add more flavor and stay juicier during cooking. Use 1.5 lb boneless thighs instead of breasts, and reduce cooking time to 6-8 minutes (they cook faster). The skin can be left on for extra richness—just remove it before stuffing. For best texture, trim any excess fat to prevent greasiness in the filling.
What's the secret to extra crispy kathi rolls?
The key is in the dough and cooking method. Use 1 extra tbsp ghee when making the dough, and let it rest 45 minutes (longer rest = more layers). Cook on medium heat with ½-inch of oil in the pan, and press down gently with a spatula during the last 30 seconds of cooking. For restaurant-style crispiness, cook until deep golden brown spots appear.