
Breakfast & Brunch
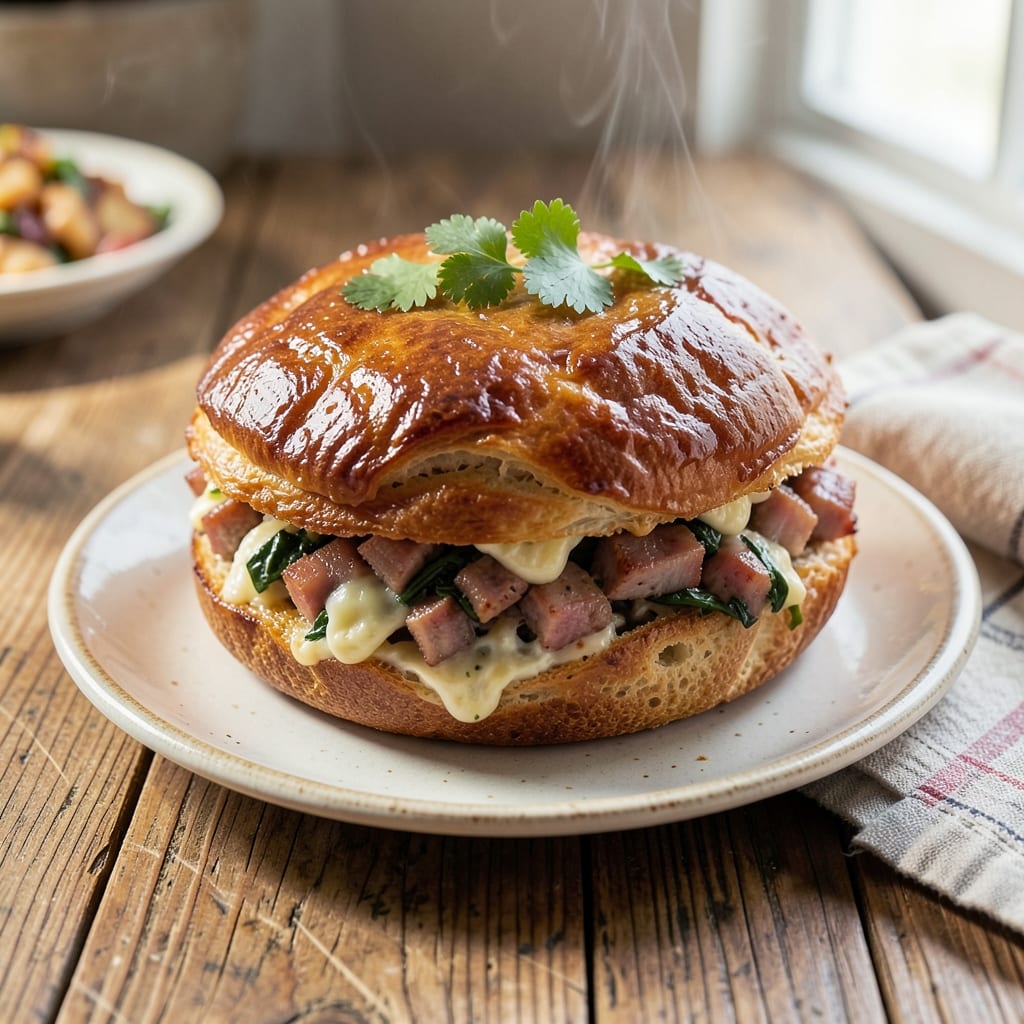
This Chinese egg meat bread recipe delivers the perfect balance of flaky, golden layers and rich, savory pork filling—just like the versions you'd find in bustling Hong Kong bakeries. 🌟 The secret lies in a well-proofed dough that creates those signature crispy, airy pockets while encasing a flavorful mixture of ground pork, eggs, and aromatic spices.
What sets this recipe apart is the traditional approach to both dough and filling. The dough uses a simple combination of flour, yeast, and water, but the technique—proper kneading and resting—is what transforms it into those delicate, melt-in-your-mouth layers. Meanwhile, the filling combines ground pork with beaten eggs and a blend of soy sauce, sesame oil, and scallions for maximum flavor impact.
Once baked, you'll be rewarded with a loaf that's crisp on the outside and tender within, with each bite revealing a harmonious mix of flaky dough and savory filling. The aroma alone will have everyone gathering around the table, and the texture—crispy yet yielding—makes it impossible to eat just one slice.
This recipe works beautifully whether you bake it in a traditional loaf pan or shape it into individual buns for a more handheld experience. Perfect for breakfast, snacks, or even as a side dish, it's a crowd-pleaser that brings a taste of China to your kitchen with minimal effort.
Ingredients for chinese egg meat bread
Sixteen ingredients transform into golden, flaky layers with savory pork filling—just like Hong Kong bakeries make.
| Ingredient | Amount | Notes |
|---|---|---|
| All-Purpose Flour 🌾 | 4 cups | Plus 2 tbsp for dusting |
| Active Dry Yeast 🍞 | ¼ oz | Or 2 1/4 tsp |
| Granulated Sugar 🍬 | ½ tsp | For yeast activation |
| Warm Water 💧 | 1 ¼ cups | 110°F for yeast |
| Unsalted Butter 🧈 | ½ cup | Cold, cubed for dough |
| Large Eggs 🥚 | 2 whole | Room temperature |
| Ground Pork 🐷 | 1 ½ lb | 80/20 fat ratio |
| Large Eggs 🥚 | 4 whole | For filling, beaten |
| Light Soy Sauce 🥢 | 2 tbsp | Kikkoman preferred |
| Sesame Oil 🫒 | 1 tbsp | Toasted, not flavored |
| Scallions 🧅 | ¼ cup | Thinly sliced, green parts |
| Ground White Pepper 🌶️ | ½ tsp | For subtle seasoning |
| Salt 🧂 | 1 ½ tsp | Kosher or sea salt |
| Vegetable Oil 🫒 | 1 tbsp | For greasing pan |
The flour is non-negotiable here—King Arthur or Gold Medal gives the best texture. If you're buying yeast, check the expiration date—old yeast won't activate properly. Ground pork with an 80/20 fat ratio is key for juicy filling (the leaner stuff dries out). I grab mine pre-ground at Costco or Trader Joe's—just make sure it's fresh. The sesame oil? Toasted sesame oil from the Asian aisle makes all the difference—it's worth the extra dollar.
No sesame oil? Toasted peanut oil works in a pinch, but the flavor won't be authentic. Short on scallions? Green onions at half the amount or even a splash of Chinese black vinegar for umami. The filling can be prepped a day ahead and chilled—cover tightly so it doesn't dry out. For the dough, if you don't have a kitchen scale, use the spoon-and-level method for flour measurements. And trust me on the cold butter—it keeps those layers crispy.
The dough needs 2 hours of resting time—don't rush it. Shape the loaf into a 9x5-inch pan for classic slices or divide into 12 buns for handheld versions. Baked filling keeps 3 days in the fridge, wrapped tightly. The bread? 2 days at room temp in a bread bag, or 3 months frozen. I always make a double batch—freezer loaves reheat perfectly for quick breakfasts.
Why You'll Love This Recipe
- No Yeast Fuss: I swear, the dough comes together faster than my coffee brews. Just mix flour, sugar, yeast, and warm water—no kneading, no waiting for hours. The butter adds that rich pull-apart magic while keeping it light, and honestly? My kids help dump the ingredients.
- Umami-Packed Punch: That egg and meat filling—ground pork or chicken, seasoned with soy sauce and a hint of five-spice—transforms a simple dough into something ridiculously good. The contrast of the savory filling against the buttery, slightly sweet bread? Chef’s kiss every time.
- Lunchbox Hero: Between us, this bread is my go-to for school lunches or office snacks. The filling stays warm and flavorful even after baking, and the crust holds up to travel. Pack it the night before, and you’ve got zero-morning-stress lunches for the week.
- Budget Stretch: Flour, butter, yeast—these are pantry staples that won’t break the bank. A single batch feeds four, and leftovers toast up just as well the next day. I’ll be real: I’ve made this twice in one week because it’s that reliable.
Step-by-step instructions for Chinese egg meat bread
Here's how to make this iconic bread with crispy, flaky layers and a rich pork-egg filling.
👨🍳 Step 1: Activate the Yeast and Make the Dough
In a small bowl, whisk together the 1.25 cups warm water (should feel like bath water, 110°F), 0.5 tsp granulated sugar, and 0.25 oz active dry yeast. Let it sit for 5-10 minutes until foamy—this tells you your yeast is alive and ready to work. If it doesn't foam, your yeast is dead and you'll need to start over.
In a large bowl, combine the 4 cups all-purpose flour and 1.5 tsp salt. Make a well in the center and pour in the yeast mixture along with the 2 whole large eggs and 0.5 cup cold unsalted butter (leave it cubed for best results). Mix with a wooden spoon until it starts to come together, then turn it out onto a lightly floured surface and knead for 8-10 minutes until smooth and elastic.
🍳 Step 2: Prepare the Savory Pork-Egg Filling
While the dough rests, make the filling by cooking the 1.5 lb ground pork in a non-stick skillet over medium-high heat until no longer pink, about 5-6 minutes. Drain any excess fat, then add 2 tbsp light soy sauce, 1 tbsp sesame oil, 0.25 cup thinly sliced scallions, and 0.5 tsp ground white pepper. Cook for another 2 minutes until fragrant.
Remove from heat and let cool slightly. In a separate bowl, beat the 4 whole large eggs until just combined, then gently mix them into the pork mixture. The filling should be thick but still spreadable—this is perfect for stuffing between the bread layers. Cover and refrigerate until ready to use.
🥘 Step 3: Shape and Layer the Bread
Roll out the dough into a 12x16-inch rectangle on a floured surface, about 1/8-inch thick. Spread the pork-egg filling evenly over the dough, leaving a 1-inch border around the edges. Roll up tightly from the long side like a jelly roll, then pinch the seam to seal.
Cut the log into 6 equal pieces (about 2 inches each) and arrange them in a greased 9x13-inch baking dish, cut-side down. Cover loosely with plastic wrap and let rise in a warm place for 1 hour or until doubled in size. The dough should feel light and springy when pressed gently.
🔥 Step 4: Bake to Golden Perfection
Preheat your oven to 375°F. Brush the risen bread with a little water using a pastry brush, then bake for 25-30 minutes until the tops are golden brown and the internal temperature reaches 190°F. For extra flakiness, I like to spray the bread with 1 tbsp vegetable oil halfway through baking.
Let the bread cool for 10 minutes before slicing—this resting time prevents the layers from falling apart. The result should be crispy, flaky layers with a rich, savory pork-egg filling oozing out between each slice. Serve warm with a side of pickled vegetables for the full experience!
Pro Tips For Making Chinese Egg Meat Bread
- TEST YEAST FIRST: Skip the guesswork—mix a tiny pinch of yeast with warm water and sugar, then wait 5-10 minutes for bubbles. If nothing happens, toss it and start fresh. I’ve wasted dough over dead yeast, and you don’t want that bitter lesson.
- KNEAD UNTIL SILKY: This isn’t a quick punch-down—work the dough for 8-10 minutes by hand until it’s smooth and springs back when poked. Over-kneading dries it out, but under-kneading means dense, chewy bread. (Yes, your arms will protest.)
- CHILL THE DOUGH: Let the shaped loaves rise overnight in the fridge—this slows fermentation and develops deeper flavor. No time? At least give them 2 hours in the fridge after the first rise. Rushing leads to flat, gummy bread.
- BUTTER TEMP MATTERS: Use softened butter (not melted) when mixing—it blends better and creates a tender crumb. If your butter’s too cold, the dough fights you; too hot, and you’ll end up with greasy bread. Room temp is your friend.
Essential equipment for great chinese egg meat bread
Dough Essentials
Start with a stand mixer fitted with a dough hook—this makes kneading the 4 cups all-purpose flour and 2 eggs effortless. I use my KitchenAid Artisan Series for its consistent speed control, but a hand mixer works too if you knead by hand for 8-10 minutes. For shaping, a rolling pin with a 12-inch diameter ensures even thickness when spreading the dough to 1/8-inch. 🌾
Don’t skip the digital kitchen scale—measuring flour by cups leads to inconsistent results. A baker’s percentage scale helps track dough hydration, but even a basic Ozeri Pronto Digital Scale (under $20) keeps your 4 cups flour accurate. For resting, a proofing box maintains 80°F humidity, but a turned-off oven with a bowl of hot water works in a pinch.
Filling Tools
A non-stick skillet (I love All-Clad Stainless) prevents ground pork from sticking while cooking. Use a meat thermometer to ensure it reaches 160°F—ground pork can dry out if overcooked. For mixing the 4 eggs into the filling, a flexible silicone spatula ensures no streaks remain. A fine-mesh strainer helps drain excess fat if needed.
Toasted sesame oil is best measured with a small squeeze bottle—just 1 tablespoon makes all the difference. A microplane quickly minces scallions for even distribution. Store filling in an airtight container with parchment paper between layers to prevent drying.
Baking Gear
A 9x13-inch baking dish is ideal for the loaf, but a 9x5-inch pullman pan works for individual buns. Grease with vegetable oil or use parchment paper for easy removal. For extra flakiness, a pastry brush applies water or oil between layers. Preheat your oven with a thermometer—375°F is critical for even baking.
Let baked bread rest on a wire cooling rack to avoid sogginess. For reheating, a toaster oven crisps slices perfectly, while a steam basket revives stale bread in seconds. Keep a sharp serrated knife handy—it slices through layers cleanly without crushing them. 🔥
Optional Upgrades
Invest in a proofing basket for shaped buns—it creates professional ridges. A digital instant-read thermometer (like Thermoworks Thermapen) ensures 190°F internal temp accuracy. For storage, vacuum-seal bags extend freshness to 3 months in the freezer.
No mixer? A wooden dough scraper helps fold dough efficiently by hand. A laser thermometer (like Kizen) checks oven temp without opening the door. These upgrades aren’t mandatory, but they elevate results—especially for repeat bakers. ✨
Nutrition facts
Frequently asked questions
Can I use chicken instead of pork in the filling?
Ground chicken works beautifully and keeps the same rich texture. Use the same amount (1.5 lb) and cook it to 165°F instead of 160°F for safety. The flavor will be slightly lighter but still delicious—just add an extra ½ tsp soy sauce to compensate.
Why did my bread turn out dense instead of flaky? Dense bread usually means the dough didn't rest long enough or was overworked.
How do I make this into individual buns instead of a loaf?
After rolling the dough and spreading the filling, cut the log into 12 equal pieces instead of 6. Arrange them in a greased 9x5-inch pan with cut-side up, cover, and let rise for 1 hour. Bake at 375°F for 18-20 minutes until golden.
Can I make the filling ahead of time?
Yes! The filling keeps well in an airtight container in the fridge for 2 days or frozen for 1 month. Thaw overnight in the fridge before using. Just be sure to let it cool completely before refrigerating to prevent condensation.
What's the best way to reheat leftover slices?
For crispy layers, use a toaster oven at 350°F for 3-4 minutes. Or wrap slices in foil and warm in a 300°F oven for 5 minutes. Avoid microwaving—it makes the dough soggy.