
Breakfast & Brunch
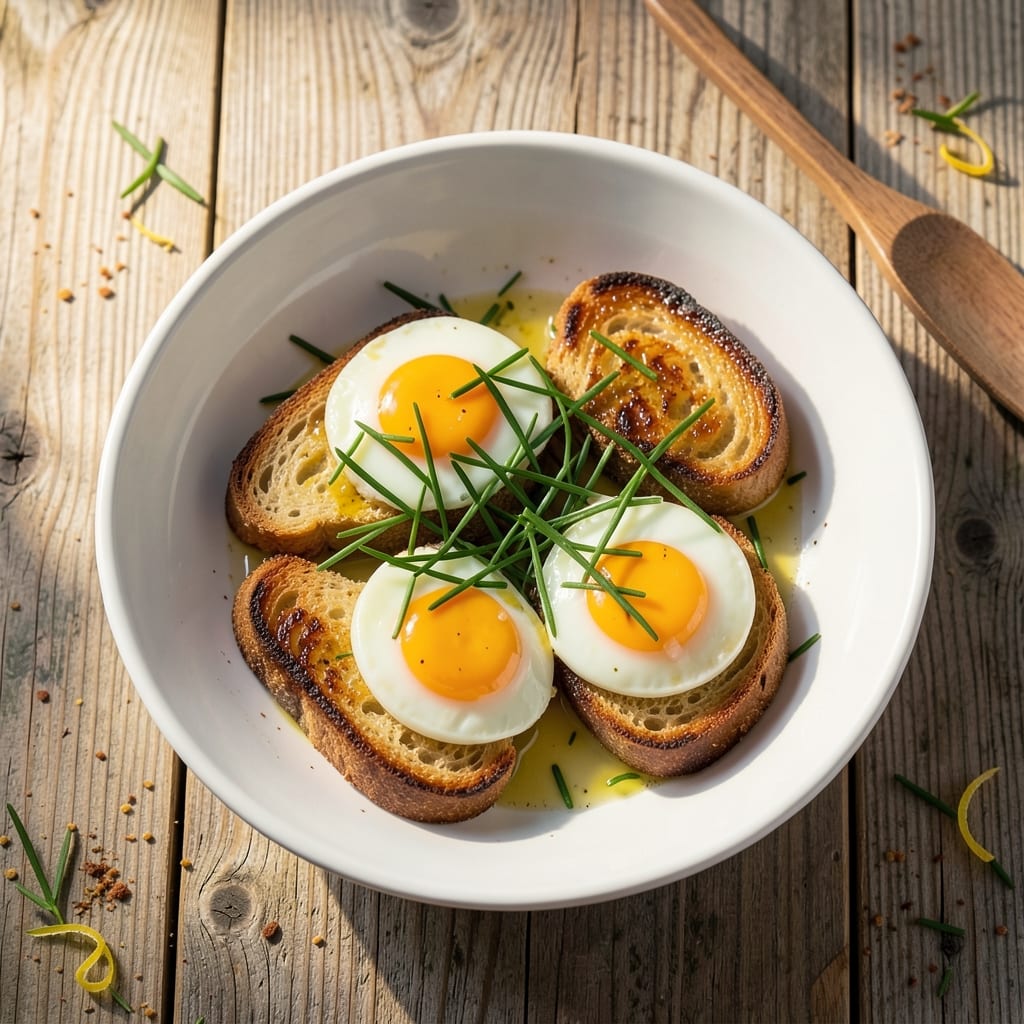
This chives and eggs recipe transforms a simple breakfast into a restaurant-worthy dish with just 10 minutes of active work. The secret lies in crispy fried eggs topped with fresh chives that add a bright, oniony zing—no complicated techniques required. I perfected this after realizing how much brighter fresh herbs make even the most basic egg dishes taste, and it’s become my go-to for quick, satisfying mornings.
The magic happens when you fry the eggs in butter until the whites are set but the yolks remain runny, then finish them under the broiler for a golden, slightly crispy top. Fresh chives get chopped fine and sprinkled generously over the top, where their delicate flavor cuts through the richness of the eggs. This isn’t just breakfast—it’s a flavor-packed, protein-rich meal that feels special without requiring effort.
What you’ll end up with is a plate of eggs with crispy edges and creamy yolks, crowned with bright green chives that add freshness in every bite. The dish comes together faster than ordering takeout but tastes like something you’d find on a brunch menu. Serve with toast or avocado for a complete meal that’s ready in under 15 minutes—perfect for busy mornings or lazy weekends.
This recipe works equally well for fried, poached, or scrambled eggs—just adjust the cooking time slightly. The chives can be swapped for green onions or parsley if you’re out, but fresh chives are the true star here. Let’s get cooking!
Ingredients for chives egg
Eight simple ingredients for a breakfast that tastes like a brunch special.
| Ingredient | Amount | Notes |
|---|---|---|
| Large Eggs 🥚 | 4 whole | Room temperature preferred |
| Unsalted Butter 🧈 | 4 tbsp | European-style preferred |
| Fresh Chives 🌿 | ¼ cup | Finely chopped, stems and leaves |
| Salt 🧂 | ½ tsp | Diamond Crystal kosher salt |
| Black Pepper 🌶️ | ¼ tsp | Freshly ground preferred |
| Sourdough Bread 🍞 | 4 slices | Toasted for serving |
| Avocado 🥑 | ½ whole | Sliced, for optional garnish |
| Extra-Virgin Olive Oil 🫒 | 1 tbsp | For toasting bread |
The chives are non-negotiable here—they make this dish shine. Fresh is a must (the frozen stuff just doesn't cut it), so grab a bunch from the grocery store's produce section. Look for vibrant green stems with no yellowing—those are the freshest. I usually get mine from Whole Foods or the local farmers market, but the regular supermarket works fine too. Pro tip: buy extra and store them wrapped in damp paper towels in the fridge—they'll last for 1 week and you'll have them for other recipes. For the eggs, room temperature is key—they'll cook more evenly and the yolks stay perfectly runny.
No fresh chives? Green onions work in a pinch, but they're stronger, so use half the amount. Short on butter? Olive oil or ghee keeps the eggs crispy, though butter gives that unmatched richness. The sourdough bread can be any good-quality bread—baguette or ciabatta both work well. Want to skip the avocado? Cherry tomatoes or radishes add a nice fresh contrast. And if you're feeling fancy, a sprinkle of crumbled feta adds a tangy kick (though this keeps it strictly egg-focused). The eggs can be fried, poached, or scrambled—just adjust the cooking time slightly.
Butter separates fast when melted, so store it in the fridge and let it sit out for just 5 minutes before using. The chives keep best in the fridge, wrapped in damp paper towels, for up to 1 week. For the eggs, use within 3 days of purchase for best quality. This whole dish reheats beautifully—just pop the eggs in a skillet for 1 minute to warm through. Leftovers? Store the eggs and chives separately, then reassemble when ready to eat.
Why You'll Love This Recipe
- Five-Minute Magic: I swear, this is the kind of recipe where you can crack eggs straight from the fridge, melt butter in a pan, and walk away while it does its thing. No flipping, no fuss—just golden yolks and crispy edges that happen almost by accident.
- Herb-Packed Punch: That bright, grassy chive flavor cuts through the richness of the eggs like a cool breeze. Honestly, I’ll take this over plain scrambled eggs any day—it’s like a little burst of freshness in every bite, and the pepper ties it all together.
- Breakfast or Brunch Fix: Serve it with toast for a lazy weekend brunch or toss it into a wrap for a quick office lunch. Between us, I’ve even used leftover eggs to top avocado toast the next morning—because why waste good food?
- Budget Breakfast Winner: Eggs and butter are the ultimate pantry staples, and a bunch of chives lasts forever if you store them right. This recipe costs me pennies but always feels like a treat—no fancy ingredients, just pure satisfaction.
Step-by-step instructions for crispy chives and eggs breakfast
Here's how to make this fast, crispy-topped breakfast that's ready in minutes.
Toast the Sourdough Bread
Preheat your oven to 375°F and place the 4 slices of sourdough bread on a baking sheet. Brush each slice generously with 1 tablespoon of extra-virgin olive oil, making sure to cover every surface. This creates a crispy base and helps the oil distribute evenly.
Toast the bread for 8-10 minutes until the edges are golden brown and the bread feels firm to the touch. Keep an eye on it—sourdough can vary in thickness, so check at the 7-minute mark if you prefer extra crispiness. Remove from the oven and set aside on a wire rack.
Prepare the Egg Mixture
In a medium bowl, crack the 4 whole large eggs and whisk them lightly until the yolks and whites are just combined. Add the 0.25 cup of finely chopped fresh chives, 0.5 teaspoon of salt, and 0.25 teaspoon of black pepper, then mix gently to distribute the herbs evenly. The chives should be finely chopped so they melt into the eggs beautifully.
I like to use a fork for this step—it keeps the eggs from becoming too aerated, which would make the tops less crispy. If you prefer a smoother texture, you can strain the mixture through a fine-mesh sieve to remove any larger chive pieces.
Melt the Butter for Crispy Tops
Place a large skillet over medium-high heat and add 4 tablespoons of unsalted butter. Let it melt completely, then reduce the heat to medium once it's fully liquid. The butter should foam gently but not brown—this is key for achieving those golden, crispy egg tops we're after.
When the butter is ready, pour the egg mixture evenly into the skillet. You want the eggs to spread into a thin, even layer. If you're using the toasted bread, place it on a plate nearby so you can serve immediately after cooking.
Cook Until Golden and Crispy
Cook the eggs for 4-5 minutes on medium heat, stirring gently once or twice to distribute the butter. You're looking for a golden brown crust to form on top—this is your signal that the eggs are nearly done. The edges should be set but still slightly runny in the center.
Here's the thing—don't overcook. The eggs will continue to set slightly as they rest. Once the top is crispy and the edges are firm, carefully transfer the eggs to a plate. Let them rest for 1 minute before serving—this helps them hold their shape better when you slice into them.
Assemble and Serve
Place the crispy egg mixture onto the toasted sourdough slices. I like to spread it evenly so each bite has that perfect combination of crispy bread and creamy, herby eggs. If you're using the optional 0.5 whole avocado, slice it and arrange it alongside the eggs for a fresh, creamy contrast.
Serve immediately while everything is warm and crispy. The combination of the golden egg tops, toasted sourdough, and fresh chives creates a breakfast that's both satisfying and full of fresh flavor. Enjoy with a cup of coffee or tea for the ultimate morning treat!
Pro Tips For Making Chives Egg
- Use Medium Heat for Butter: High heat burns butter fast—you’ll end up with a bitter, browned mess instead of a silky base. Keep the pan on medium and let the butter melt slowly; it’ll coat the eggs evenly without turning into a crispy disaster.
- Chop Chives Fine: Big chive chunks sink to the bottom or get chewy. Pulse them in a knife or food processor until they’re tiny—this way, they distribute evenly and melt into the eggs like a bright, herby blanket.
- Salt the Eggs First: I learned this the hard way—salting after cooking leaves the yolks bland. Crack eggs into a bowl, add a pinch of salt, and stir gently before pouring into the pan. The seasoning gets locked in from the start.
- Butter, Then Scrape: Once the eggs are set, tilt the pan and let the butter pool at the edge—it’s liquid gold. Use a spatula to scrape it back into the eggs so every bite gets that rich, buttery finish. (Yes, even if it looks messy.)
Make-ahead tips for leftovers
Prep Ahead for Quick Mornings
Chop your 0.25 cup fresh chives the night before and store them in an airtight container in the fridge. This saves 5 minutes of morning prep time and keeps the herbs vibrant. I like to store them in a small mason jar with a damp paper towel to maintain freshness. 🌿
Egg Prep Shortcut
Whisk your eggs and mix in the chopped chives up to 24 hours ahead, then refrigerate in an airtight container. When ready to cook, let the mixture sit at room temperature for 10 minutes before frying—this ensures even cooking. For best results, keep the eggs and chives separate until the last minute to prevent sogginess.
Toasted Bread Storage
Toast your 4 slices of sourdough bread and store them in a paper bag at room temperature for up to 2 hours. The bread stays crispy and ready to serve without reheating. If storing longer, wrap the toasted slices in foil and reheat in a 350°F oven for 3-5 minutes before serving.
Avocado Prep Tip
Slice your 0.5 whole avocado just before serving to prevent browning. Store the avocado halves in a bowl of water with plastic wrap pressed against the flesh to keep them fresh for 1 day. Sprinkle with a little lime juice if you have it—this helps preserve the color even longer.
Make-Ahead Eggs
For a meal-prep breakfast, fry the eggs as directed and let them cool completely. Store in an airtight container in the fridge for up to 2 days. When ready to eat, reheat in a skillet over medium heat for 2-3 minutes until warmed through. The crispy top may soften slightly, but the flavor stays just as good.
Herb Swap Options
If you're prepping ahead but run out of chives, swap in green onions or parsley—both store well in the fridge for 5-7 days. For extra flavor, add a pinch of garlic powder or lemon zest to the egg mixture before storing. These herbs keep their brightness longer than chives when refrigerated. ✨
Nutrition facts
Frequently asked questions
Can I make this with just regular eggs instead of the crispy-topped version?
For simple fried eggs, cook them in butter for 2-3 minutes per side until whites are set but yolks stay runny. Top with chopped chives and serve on toast. The chives add freshness without needing the crispy texture. For scrambled eggs, stir in finely chopped chives at the end for a herb-infused twist.
How do I keep the chives from turning bitter or losing their color?
Fresh chives stay vibrant when stored properly: wrap them in damp paper towels in an airtight container and refrigerate for up to 1 week. For cooking, add chives at the very end (last 1-2 minutes) to preserve their bright green color and delicate flavor. Never boil them—they wilt and lose their zing.
What's the best way to reheat leftover chive eggs?
Reheat in a nonstick skillet over medium-low heat for 2-3 minutes until warmed through. Add a pat of butter to restore crispiness. For microwave reheating, cover with a damp paper towel and heat for 20-30 seconds. The chives may soften slightly, but the flavor remains fresh.
Can I use this recipe for a brunch platter instead of individual servings?
Perfect for brunch! Double the recipe and serve the crispy egg mixture as a centerpiece on a platter with toasted bread slices around it. Garnish with extra chives, sliced avocado, or crumbled feta. Add small bowls of hot sauce or everything bagel seasoning for customization.
Why did my egg tops turn out greasy instead of crispy?
Greasy tops usually mean the butter was too hot or the eggs were overcooked. For crispy results, use medium heat and cook just until golden (4-5 minutes). Let the butter foam but not brown. If using nonstick pans, reduce butter slightly (3 tbsp) to prevent excess oil.