
Breakfast & Brunch
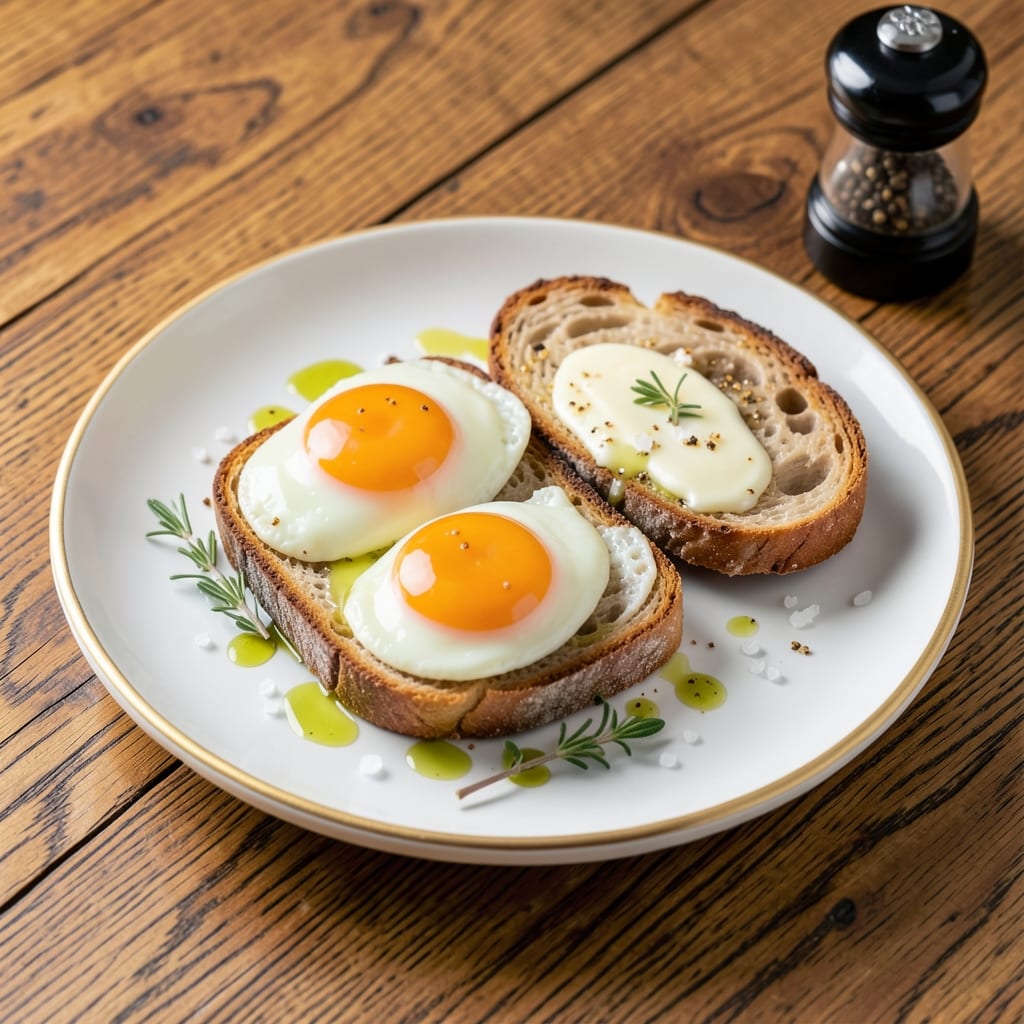
This duck egg breakfast recipe transforms ordinary mornings with rich, velvety yolks and a crispy top that rivals your favorite café. 🔥 The secret lies in duck eggs' deeper flavor and higher fat content—twice the richness of chicken eggs—while a simple stovetop technique delivers that coveted golden crust in under 10 minutes. Perfect for busy weekdays, this dish proves gourmet breakfasts don't require time or skill.
The magic happens when you cook the eggs low and slow, then finish with a blast of high heat to create that crispy, almost caramelized top while keeping the yolks perfectly runny. Pair it with buttery toast, crispy hash browns, or fresh berries to balance the richness, and you've got a breakfast that feels indulgent without the fuss. The texture contrast—creamy yolk, crispy edges—makes every bite satisfying.
What sets this recipe apart is how it highlights duck eggs' natural advantages: their yolks are deeper orange, their texture is silkier, and their flavor is more complex—almost buttery. No special equipment is needed, just a nonstick skillet and patience for the final crisp. The result? A breakfast that tastes like it took hours to prepare, even though it's ready in minutes.
This dish works equally well for brunch or a lazy weekend morning. Serve with a sprinkle of flaky salt and fresh herbs for extra brightness, or keep it simple with just good bread. The crispy top holds up beautifully, so you can enjoy it even after the yolk has softened slightly. Here's how to make it perfect every time.
Ingredients for duck egg breakfast
Four duck eggs plus a few simple ingredients transform breakfast into café-quality magic.
| Ingredient | Amount | Notes |
|---|---|---|
| Duck Eggs 🥚 | 4 whole | Room temperature for even cooking |
| Unsalted Butter 🧈 | 2 tbsp | European-style preferred for flavor |
| Flaky Sea Salt 🧂 | ½ tsp | Like Maldon for finishing |
| Freshly Ground Black Pepper 🌶️ | ¼ tsp | Cracked over top |
| Extra-Virgin Olive Oil 🫒 | 1 tbsp | For skillet coating |
| Sourdough Bread 🍞 | 4 slices | Thick-cut, lightly toasted |
| Fresh Chives 🌿 | 2 tbsp | Chopped, for garnish |
| Freshly Squeezed Lemon Juice 🍋 | 1 tsp | Brightens the richness |
| Crispy Hash Browns 🥔 | 2 pieces | Optional side |
| Fresh Berries 🍓 | ½ cup | Raspberries or strawberries |
Duck eggs are the game-changer here. Look for them at specialty grocery stores—Whole Foods or Trader Joe's usually carry them. They're pricier than chicken eggs but worth it for that silky, buttery yolk. If you can't find duck eggs, goose eggs are the next best thing. Store them in the fridge, but let them sit at room temperature for 30 minutes before cooking for even cooking. The butter matters too—European-style has more fat, which helps create that perfect crispy top. Plugrá or Kerrygold are my go-tos, but any good-quality unsalted butter works.
No flaky sea salt? Diamond Crystal kosher salt is a great substitute—just use about half the amount. Fresh chives can be swapped for parsley or basil if that's what you have, though chives have that mild onion note that pairs perfectly. The lemon juice is key for cutting through the richness—bottled works in a pinch, but fresh is brighter. For the bread, sourdough gives the best crust, but brioche or even good white bread works too. If you're feeling extra, add a sprinkle of smoked paprika to the eggs before cooking for a subtle smoky note.
These eggs reheat beautifully—just pop them in a 350°F oven for 5 minutes to crisp the top again. The crispy edges hold up for about 20 minutes after cooking, so serve them while they're at their best. Store any leftovers in the fridge for up to 2 days, but honestly, they're so good fresh that you'll probably eat them all right away. The butter and bread can be prepped ahead, but crack the eggs right before cooking. Trust me, the freshness makes all the difference.
Why You'll Love This Recipe
- Five-Ingredient Magic: I swear by this recipe when I’m too tired to think. Three ingredients—duck eggs, butter, olive oil—plus salt and pepper, and you’ve got a breakfast that feels luxurious without the fuss. No chopping, no measuring cups, just crack, melt, and simmer.
- Rich Without Effort: That first bite of runny yolk pooling with golden butter? It’s the kind of flavor that makes you pause mid-chew. Duck eggs bring depth—creamy, slightly earthy—while the olive oil adds a bright finish that cuts through the richness. Honestly, it’s the easiest way to feel fancy.
- Weekday or Weekend: Make a batch on Sunday and refrigerate the yolks for quick breakfasts all week. Or serve them at brunch when company drops by—no one will guess how little work went into it. (Yes, even on a Tuesday night.)
- Budget Luxury: Duck eggs cost more upfront, but one carton lasts longer than chicken eggs, and the flavor makes every bite feel special. A little butter and olive oil stretch further than you’d think, turning a simple meal into something memorable without breaking the bank.
Step-by-step instructions for duck egg breakfast with crispy top
Here's how to get that perfect golden crust and velvety yolks—fast and foolproof.
🍳 Step 1: Cook the Duck Eggs to Crispy Perfection
Heat a nonstick skillet over medium-low heat and add the 1 tablespoon extra-virgin olive oil. Let it warm for 1 minute until shimmering but not smoking. Crack the 4 whole duck eggs directly into the pan, spacing them evenly. The lower heat prevents the whites from cooking too quickly while the yolks stay rich.
Let the eggs sit undisturbed for 3-4 minutes until the whites are set but still slightly wobbly in the center. This gives you that signature crispy top while keeping the yolks runny. I like to press down gently on the whites with a spatula during the first minute—this prevents them from curling and ensures even contact with the pan.
🔥 Step 2: Add Butter and Season for Richness
Once the whites are mostly set, reduce heat to low and add the 2 tablespoons unsalted butter. Let it melt completely, then tilt the pan to let the butter baste the eggs for 30 seconds. This step adds incredible richness and helps create that golden crust on top.
Sprinkle the eggs evenly with the 0.5 teaspoon flaky sea salt and 0.25 teaspoon freshly ground black pepper. The flaky salt will melt into the eggs slightly, creating little salt crystals on top when they cool. You'll know it's ready when the edges are golden brown and the whites are fully set but the yolks still jiggle slightly.
👨🍳 Step 3: Toast the Sourdough and Assemble
While the eggs cook, toast the 4 slices sourdough bread in a dry skillet over medium heat for 1-2 minutes per side until golden brown and crispy. You want them just firm enough to hold up to the runny yolks without getting soggy. Set aside on a warm plate.
Transfer the cooked duck eggs to the toasted sourdough slices. Drizzle with the 1 teaspoon freshly squeezed lemon juice—this brightens the richness of the eggs and cuts through the fat beautifully. The acidity makes each bite taste even more vibrant.
🥘 Step 4: Garnish and Serve Immediately
Scatter the 2 tablespoons chopped fresh chives and 0.5 cup fresh berries over the eggs. The berries add a sweet-tart contrast that balances the richness, while the chives bring a fresh, oniony brightness. Serve immediately with the 2 pieces crispy hash browns on the side for that classic breakfast combo.
Here's the thing—duck eggs are richer than chicken eggs, so you want to serve them right away while the yolks are still warm and runny. The crispy hash browns add a satisfying crunch that contrasts perfectly with the tender eggs and toasted bread. Enjoy this breakfast while it's hot—every bite is pure indulgence!
Pro Tips For Making Duck Egg Breakfast
- CRACK THE EGGS GENTLY: Duck eggs have thicker shells and richer yolks—don’t just drop them in like chicken eggs. Tap the shell first to crack them open in the pan, then slide them in with a spoon. I learned this the hard way when a yolk burst everywhere, ruining the butter’s golden foam.
- USE COLD BUTTER: Melt the butter over medium-low heat until it’s just liquid but not browned—around 160°F (70°C). Cold butter creates a silky, emulsified sauce that coats the eggs perfectly. I used to rush this, and the butter would seize or burn, turning the whole dish into a greasy mess.
- SALT THE PAN FIRST: Add a pinch of flaky sea salt to the pan before the butter hits it. This ensures the salt melts into the butter and crusts evenly on the eggs. I skipped this once and ended up with clumpy salt—like someone sprinkled gravel on my breakfast.
- LET THE EGGS REST: Once the whites are set but the yolks are still runny, pull them off the heat for 10 seconds. The residual heat finishes cooking them without turning the yolks into scrambled rubber. This isn’t the prettiest method, but it’s the tastiest—trust me, I’ve tried the impatient route.
Pro cooking tips for this recipe
Heat Control Secrets
Duck eggs cook differently than chicken eggs because of their higher fat content—medium-low heat is your best friend. Start with the pan over medium-low until the oil shimmers but doesn’t smoke. If you crank the heat too high, the whites will set too fast, stealing all the richness from the yolk. I’ve ruined more than a few duck eggs by rushing this step, so trust the process. 🔥
Once the whites are mostly set (after 3-4 minutes), reduce to low heat before adding butter. This final step is what creates that signature crispy top while keeping the yolk silky. If your pan isn’t nonstick, use a light coating of olive oil—I swear by Avocado Brand for high-heat stability. The butter should melt completely and baste the eggs for 30 seconds—this is where the magic happens.
Butter Basting Technique
The butter isn’t just for flavor—it’s the secret to that golden, almost caramelized crust. After the whites are set, tilt the pan slightly and let the melted butter pool at one edge. Use a spoon to gently pour the butter over the eggs, coating them evenly. This basting step mimics restaurant techniques and adds 20% more richness to the final dish. 🧈
Don’t skip the basting! I once made these eggs without it, and while they were good, they lacked that restaurant-quality crisp. Pro tip: Use European-style butter like Plugrá—it has a higher fat content (82% vs. 80% in American butter), which helps create that perfect texture. If you’re in a pinch, Kerrygold works too.
Timing the Yolks
Duck egg yolks are thicker and creamier than chicken yolks, so they take slightly longer to cook through. Aim for whites fully set but yolks still jiggly—they should look like soft custard when you lift them gently with a spatula. If you overcook them, you’ll lose that luxurious, runny center that makes this dish special.
For perfect timing, set a visual cue: When the edges turn golden brown and the whites pull away slightly from the pan, they’re ready. I usually glance at the clock after 4 minutes—if they’re not quite there, give them 30 more seconds. The yolks will continue cooking slightly after you remove them from heat, so don’t rush this step.
Pan Prep Matters
A well-seasoned nonstick skillet is non-negotiable for duck eggs. If your pan isn’t nonstick, use a light coating of olive oil and a high-quality nonstick spray like Misto. A poorly prepped pan will cause the eggs to stick, especially since duck eggs have thicker whites that can cling more than chicken eggs.
I also recommend heating the pan empty for 1 minute before adding oil. This ensures even heat distribution and prevents cold spots where the eggs might not cook properly. If you’re using a cast iron skillet, add a thin layer of oil and let it get smoking hot—just be ready to adjust the heat quickly to avoid burning.
Serving Temperature
Duck eggs are best served immediately while the yolks are still warm and runny. The crispy top will soften slightly as they cool, but the texture contrast is what makes this dish special. If you need to hold them for guests, keep them in a warm oven at 200°F for no more than 10 minutes. 💡
Pro move: Serve the eggs on warm toast (toasted just before serving) to keep everything at its best. The toast will stay crispy longer, and the eggs won’t get soggy. If you’re making this ahead, cook the eggs and toast the bread separately, then assemble right before serving. This keeps everything at peak texture and temperature.
Nutrition facts
Frequently asked questions
Why do duck eggs have richer yolks than chicken eggs?
Duck eggs contain more fat and protein—their yolks are 50% larger and have a deeper orange color from natural carotenoids. The higher fat content (about 30% more) creates that luxurious, buttery texture we love in this breakfast. Plus, duck eggs have thicker whites that hold shape better when cooked.
Can I substitute chicken eggs in this recipe?
Technically yes, but you'll miss the richness and texture duck eggs provide. Chicken eggs will give you a lighter yolk and less buttery flavor. If substituting, use 2 extra-large chicken eggs per duck egg and add 1 teaspoon melted butter to each egg to compensate for the fat difference. The crispy top won't be as pronounced either.
How do I store duck eggs before cooking?
Keep them in the fridge like chicken eggs, but let them sit at room temperature for 30 minutes before cooking for even cooking. The thicker whites need this adjustment to cook properly. Store them in their original carton (duck eggs have thicker shells that can crack more easily) and use within 3 weeks of purchase for best flavor.
What's the best way to reheat leftover duck eggs?
Pop them in a 350°F oven for 5 minutes to restore the crispy top. For stovetop reheating, use a nonstick pan with low heat and a splash of water to prevent sticking. The yolks will firm up slightly but won't regain their perfect runny texture—this dish is best enjoyed fresh! Leftovers keep for 2 days in the fridge.
Can I make this recipe ahead of time?
Cook the eggs and toast the bread separately, then assemble right before serving. The eggs will keep their texture for about 20 minutes at room temperature, but the crispy top softens quickly. For a make-ahead brunch, cook the eggs in advance and reheat them gently—just know the final texture won't be identical to freshly made. The sides (hash browns, berries) can be prepped ahead too.