
Breakfast & Brunch
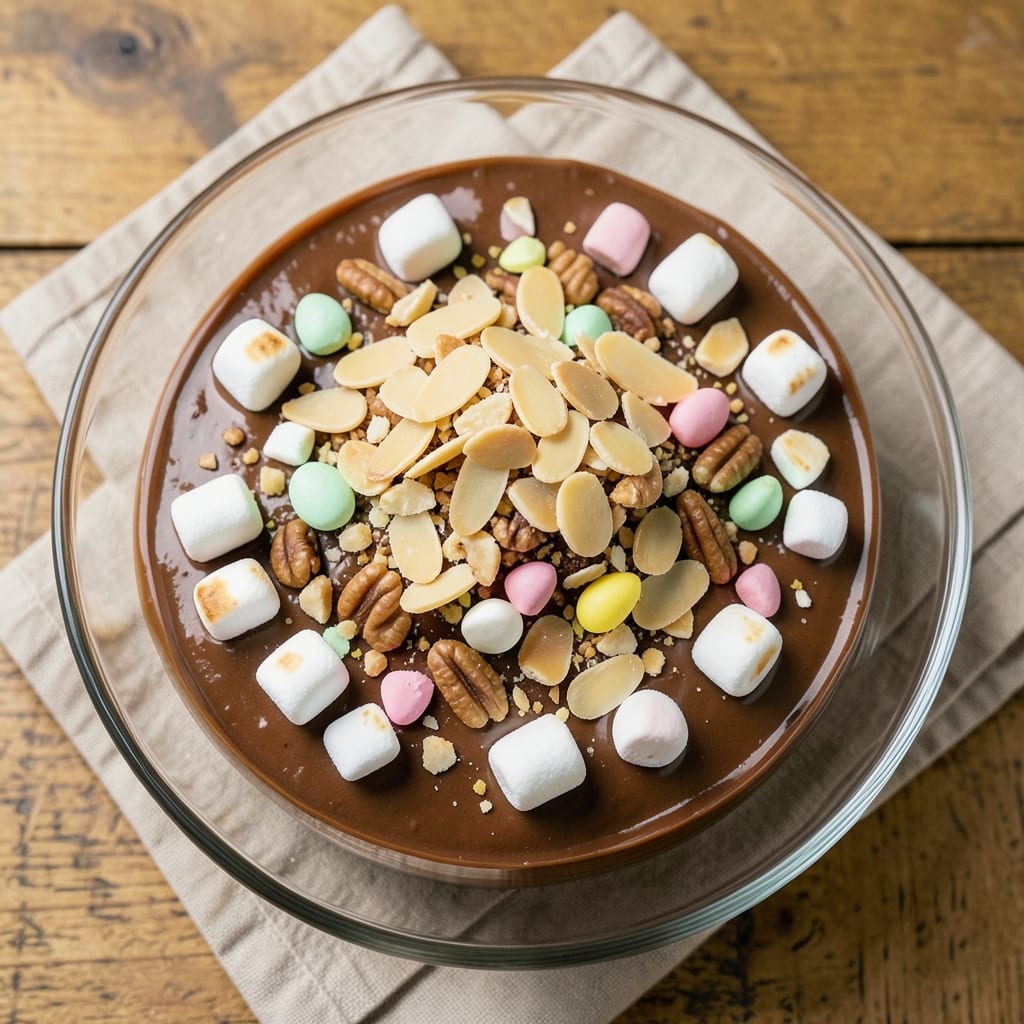
This Easter egg rocky road recipe transforms a classic dessert into a vibrant spring celebration with layers of rich chocolate, gooey marshmallows, and crunchy nuts—all topped with pastel-colored candy and mini chocolate eggs. The secret lies in baking the base just enough to create a fudgy texture that holds together while staying tender, then assembling it with a creamy marshmallow-nut mixture that stays perfectly gooey. What makes this recipe special is how it balances indulgence with festive presentation, making it ideal for Easter brunches, spring gatherings, or simply treating yourself to something extra special.
The process starts with a simple chocolate base that bakes into a thick, fudgy layer—no fancy techniques required. Once cooled, it’s topped with a generous layer of toasted nuts and mini marshmallows, then melted chocolate and crushed candy for that signature rocky road texture. The real magic happens in the final step: decorating with pastel-colored sprinkles, crushed candy eggs, or even edible glitter to give it that celebratory Easter look. Every bite delivers a perfect mix of textures—crispy, chewy, and creamy—while the colors make it feel like a dessert straight from a springtime celebration.
This recipe is designed to impress without being complicated, making it perfect for both beginners and experienced bakers. The fudgy chocolate base sets the foundation, while the marshmallow-nut mixture adds that classic rocky road crunch. The best part? It can be made ahead of time, so you can focus on enjoying the holiday with family and friends. Whether you’re serving it at a brunch or saving it for a cozy Easter treat, this dessert is sure to become a new tradition.
For an extra festive touch, consider using pastel-colored chocolate chips or adding a layer of white chocolate drizzle before the final toppings. The combination of textures and colors makes this dessert as beautiful as it is delicious—ideal for capturing Easter’s joy in every bite. Let’s get started on creating this showstopper!
Ingredients for easter egg rocky road
Twelve ingredients transform into a showstopping Easter dessert with layers of fudgy chocolate and colorful surprises.
| Ingredient | Amount | Notes |
|---|---|---|
| Semi-Sweet Chocolate Chips 🍫 | 2 cups | High-quality chips for rich flavor |
| Unsalted Butter 🧈 | 1 cup | Cut into pieces for melting |
| Granulated Sugar 🍚 | 1 ½ cups | White sugar preferred |
| Large Eggs 🥚 | 2 whole | Room temperature for blending |
| Vanilla Extract 🌿 | 1 tbsp | Pure extract for best flavor |
| Mini Marshmallows 🍬 | 3 cups | Extra for garnish if desired |
| Chopped Pecans 🥜 | 2 cups | Toasted for enhanced flavor |
| Pastel Colored Candy Eggs 🥚 | 1 ½ cups | Crushed for festive topping |
| Pastel Colored Sprinkles 🎀 | ½ cup | For vibrant Easter presentation |
| White Chocolate Chips 🍫 | ½ cup | Optional for drizzle |
| Sea Salt 🧂 | ½ tsp | Flaky salt for garnish |
| Edible Glitter ✨ | 1 tbsp | Optional for extra sparkle |
The chocolate chips and butter are your foundation—Ghirardelli or Guittard make all the difference here. Grab the best quality you can find, especially for the white chocolate if you're adding it. Pecans should be raw and fresh, not that stale bag from the back of your pantry. Toast them in a dry pan for 5-7 minutes until golden and fragrant—trust me, it changes everything. The candy eggs? Trader Joe's or Michaels have the best pastel selection, and crushing them adds that perfect crunch. Mini marshmallows are a must—don't even think about using regular marshmallows, they won't cut it.
No pecans? Almonds or walnuts work too, just toast them first. Short on pastel candy? Crushed pastel M&M's or Smarties are great substitutes. Want to skip the edible glitter? Extra sprinkles or crushed candy shells give that same festive look. The white chocolate drizzle is optional but adds a beautiful contrast—use white chocolate chips melted with a splash of cream for a smoother finish. And if you're feeling fancy, add a pinch of sea salt to the marshmallow layer—it balances all the sweetness perfectly.
This dessert keeps beautifully for 5 days in the fridge, covered tightly. The flavors actually improve after the first day as everything melds together. For Easter brunch, portion it into individual squares the night before—use parchment paper between layers so they don't stick. Freezes for 1 month if you want to make it ahead for a party. Just let it come to room temperature before serving, and watch everyone's faces light up when they see those pastel colors!
Why You'll Love This Recipe
- I’ll be real: I always double the batch because it’s impossible to stop at one serving. The leftovers keep for days in the fridge, and if you’re feeling fancy, you can even freeze it—just let it thaw a bit before digging in. Plus, with just a few basic ingredients, it’s one of those recipes where you’re not breaking the bank for a treat that feels indulgent.
- One-Bowl Wonder: I swear, this recipe is the kind of thing you’ll make just to prove how lazy (in the best way) you can be in the kitchen. Melt butter, mix in sugar, crack eggs—no fancy gadgets, no stress. The chocolate chips fold in like a dream, and honestly? The hardest part is waiting for it to cool.
- Rich & Crunchy Magic: That first bite of warm, gooey chocolate with the crunch of crushed Easter eggs? It’s like someone took all your favorite things—sweet, salty, crunchy—and stuffed them into one decadent bite. The vanilla ties it all together without overpowering, and the eggs add this surprising texture that makes it feel special.
- Holiday or Snack Attack: Between us, this is my go-to for Easter baskets, but it’s also the perfect after-school treat or office party dessert. Package it in little jars for gifts, or just scoop it straight from the pan when you’re craving something sweet. It’s festive enough for holidays but simple enough for a Tuesday night when you’re exhausted.
Step-by-step instructions for Easter egg rocky road
Here's how to create layers of fudgy chocolate perfection with festive Easter surprises.
Melt Chocolate and Butter for a Silky Base
In a large microwave-safe bowl, combine the 2 cups semi-sweet chocolate chips and 1 cup unsalted butter. Microwave in 30-second intervals, stirring between each, until completely melted and smooth. The mixture should look glossy with no remaining solid bits—this ensures a velvety texture. I like to stir vigorously after each interval to prevent uneven melting.
Remove from microwave and let cool for 2-3 minutes until just warm to the touch. This cooling step prevents the eggs from scrambling when added later. The chocolate should be thick enough to coat the back of a spoon but still pourable—this is your foundation for the fudgy layers.
Whisk in Sugar, Eggs, and Vanilla
In a separate bowl, whisk together the 1.5 cups granulated sugar, 2 whole large eggs, and 1 tbsp vanilla extract until smooth and slightly thickened. I use a hand mixer for this step to ensure no lumps remain in the eggs. The mixture should be pale yellow and slightly ribbony when you lift the whisk.
Slowly pour the warm chocolate mixture into the egg mixture while whisking continuously. This gradual addition creates a silky emulsion rather than a grainy texture. Whisk for an additional 1-2 minutes until the batter is completely smooth and glossy. The batter should coat the whisk completely when lifted—this indicates proper blending.
Fold in Marshmallows and Pecans
Using a spatula, gently fold in 3 cups mini marshmallows and 2 cups chopped pecans. I like to use a folding motion rather than stirring to maintain air pockets in the marshmallows. The batter will look slightly streaky with white marshmallow and brown pecan flecks—this is perfect. Avoid overmixing as it can deflate the marshmallows.
Divide the mixture evenly between two 8x8-inch baking dishes lined with parchment paper. I use a kitchen scale for precise distribution. Smooth the tops with a spatula, creating even surfaces for baking. This layering technique ensures consistent texture throughout each piece.
Bake Until Set with Fudgy Centers
Preheat oven to 350°F. Bake for 18-22 minutes until the edges are set but the centers still appear slightly soft. A toothpick inserted should come out with moist crumbs—not wet batter. The top should have a slight sheen but not be glossy.
Remove from oven and let cool completely in the pans for 1 hour. This cooling period allows the chocolate to fully set while maintaining that perfect fudgy texture. I know it's tempting to cut into them earlier, but patience here makes all the difference in the final texture.
Create Festive Layers and Garnish
Once completely cooled, cut each pan into 12 equal squares (6 per pan). For the festive Easter touch, place 1 crushed pastel colored candy egg on top of each piece. Then, sprinkle with 0.5 cup pastel colored sprinkles and 0.5 tsp sea salt for a sweet-salty contrast.
Melt the 0.5 cup white chocolate chips in the microwave in 20-second intervals, then drizzle over the top. Finish with a sprinkle of 1 tbsp edible glitter for extra sparkle. The combination of colors and textures makes each piece look like a mini Easter celebration. Store in an airtight container for up to 1 week or enjoy immediately for maximum freshness.
Pro Tips For Making Easter Egg Rocky Road
- Melt Butter Slowly: I learned this the hard way—dumping cold butter into the pan and ending up with lumps that never fully dissolved. Instead, cut the butter into small cubes and let it melt gradually over medium heat, stirring constantly until it’s completely smooth before adding sugar. That way, your chocolate won’t seize up later.
- Toast Your Eggs: Skip the raw egg shortcut unless you’re okay with a slightly grainy texture. Whisk the eggs first, then pour them into a nonstick skillet over low heat—just until they’re set but still slightly runny (about 2-3 minutes). This keeps them creamy and prevents that weird rubbery bite. (Yes, even if you’re impatient like me.)
- Chill the Base: After mixing your chocolate-egg base, pop it in the fridge for 10 minutes before folding in the crushed Easter eggs. Cold butter and sugar won’t melt into a greasy mess, and the eggs stay crisp instead of soggy. Trust me, this is the thing that matters most for texture.
- Crush Eggs Evenly: Grab a rolling pin and smash the hard-boiled eggs into small, consistent pieces—no giant chunks, no powdery dust. Aim for pea-sized bits so every bite has that satisfying crunch without turning your rocky road into a science experiment. (Pro move: Use a clean kitchen towel to catch the shells.)
Perfect pairings for these flavors
Spring Brunch Sides
Serve this vibrant dessert alongside strawberry shortcake or lemon blueberry muffins—both complement the chocolate's richness with bright, citrusy flavors. I like to arrange them on a tiered tray with pastel napkins to match the Easter theme. For a savory contrast, add mini quiches or herbed goat cheese crostini to balance the sweetness. 🌸
Coffee and Tea Pairings
A light roast coffee like Starbucks Blonde Roast or Peet's Major Dickason's enhances the chocolate's depth without overpowering it. For tea lovers, Earl Grey or jasmine green tea adds floral notes that harmonize beautifully with the vanilla and nuts. I always serve mine with a chilled glass of milk to cleanse the palate between bites.
Wine and Sparkling Options
Skip the wine and go for sparkling rosé like La Crema or Whispering Angel—its crisp acidity cuts through the richness while complementing the pastel colors. For a non-alcoholic option, sparkling elderflower lemonade (mix St-Germain with sparkling water and lemon) adds a refreshing contrast. The effervescence makes every bite feel extra celebratory. 🍾
Garnish Upgrades
Elevate your presentation with edible gold leaf or crushed freeze-dried strawberries for a pop of color. I also love adding mini chocolate eggs (like Ghirardelli's pastel collection) around the edges for a playful touch. A dusting of powdered sugar through a fine sieve adds a snowy Easter vibe without overpowering the flavors.
Make-Ahead Presentation
Assemble the dessert 24 hours ahead and store in an airtight container to let flavors meld. Refrigerate for 1 hour before serving to set the white chocolate drizzle. For a restaurant-worthy look, arrange pieces on a marble slab with fresh mint sprigs and pastel fondant flowers. The colors will make your Easter table look like a springtime masterpiece. ✨
Nutrition facts
Frequently asked questions
Can I make this dessert without baking?
For a no-bake version, simply melt 2 cups semi-sweet chocolate chips and 1 cup butter together, then stir in 1.5 cups sugar, 2 eggs, and 1 tbsp vanilla until smooth. Fold in 3 cups marshmallows and 2 cups pecans, then press into a lined pan. Chill for 4 hours before cutting and adding toppings. The texture will be softer but still delicious!
What's the best way to store leftovers?
Keep your Easter egg rocky road in an airtight container in the fridge for up to 5 days. For longer storage, wrap individual pieces in plastic wrap and freeze for 1 month. Let it sit at room temperature for 10 minutes before serving to soften the chocolate layers. The marshmallows stay gooey even after freezing!
How do I adjust this for a gluten-free diet?
Use a gluten-free chocolate chip brand and ensure your vanilla extract is certified gluten-free. The original recipe is naturally gluten-free, but always check ingredient labels for hidden gluten in toppings like sprinkles or candy eggs. For extra stability, add 1 tbsp cornstarch to the chocolate mixture before baking.
Can I use different nuts instead of pecans?
Yes! Try walnuts, almonds, or macadamia nuts for variety. Toast them first for 5 minutes at 350°F to enhance flavor. Chop larger nuts finely so they distribute evenly throughout the dessert. Each nut brings a unique texture—macadamias add buttery richness while almonds offer a slightly crunchier bite.
Why did my rocky road turn out too firm?
Overbaking is the most common cause. Remove the dessert when the edges are set but a toothpick comes out with moist crumbs (not wet batter). For extra fudgy texture, slightly underbake by 1-2 minutes and let it cool completely before cutting. If it's still too firm, try melting 1 tbsp coconut oil into the chocolate mixture for a softer texture.