
Breakfast & Brunch
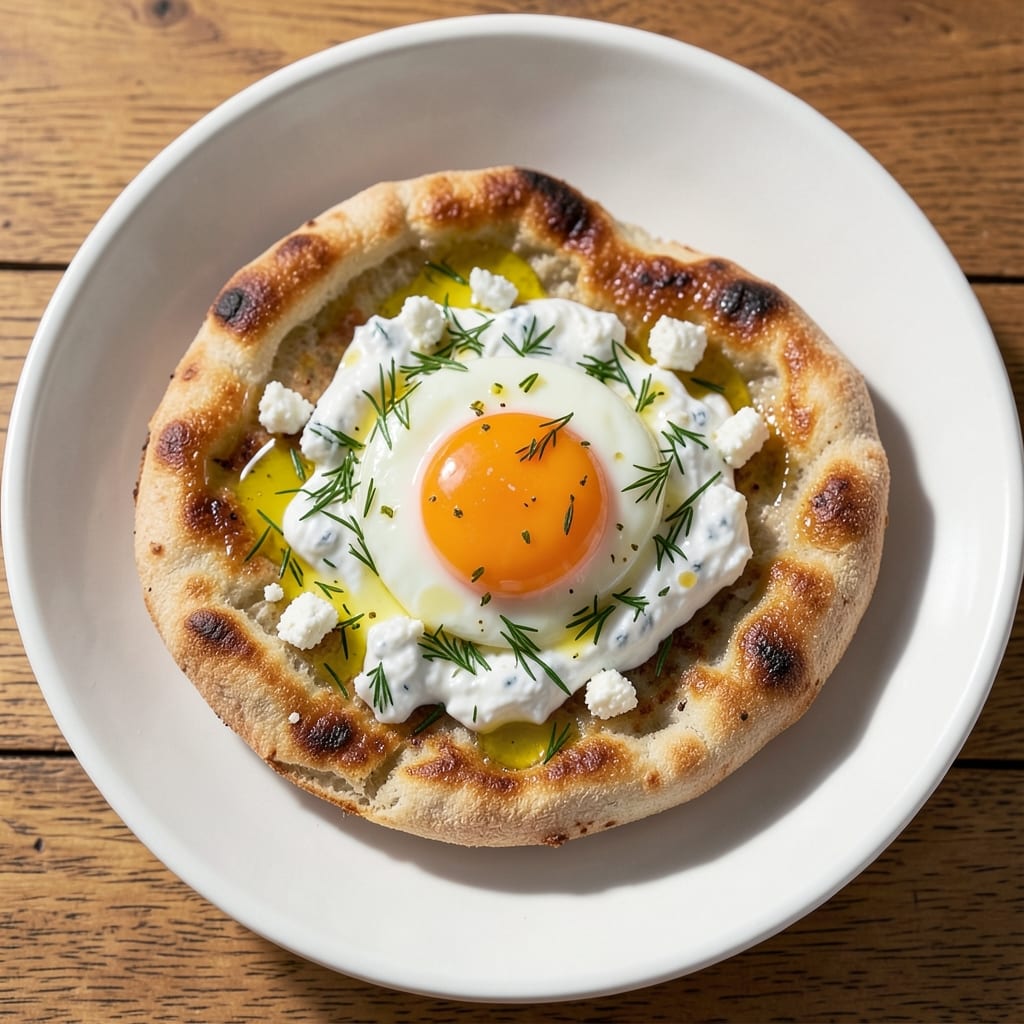
This egg and pita bread recipe transforms simple ingredients into a fluffy, yolk-centered breakfast that’s ready in just 15 minutes—perfect for busy mornings. The secret lies in crispy pita pockets that hold runny yolks and savory fillings, creating a handheld meal that’s both satisfying and elegant. Whether you’re feeding a crowd or treating yourself to a quick bite, this dish delivers restaurant-quality results without the fuss.
The beauty of this recipe is its versatility—swap fillings like feta and herbs, spicy hummus, or even a simple tomato and cucumber mix to suit any craving. The pita absorbs flavors beautifully while maintaining its signature softness, and the eggs cook to perfection with just the right amount of runniness. No fancy equipment is needed, just a skillet and a few pantry staples.
What you’ll end up with is a stack of golden pita pockets, each cradling a creamy, warm yolk and your choice of fillings. The contrast of textures—crispy pita, tender egg, and whatever toppings you add—makes every bite irresistible. This dish is ideal for brunch, a light lunch, or even a late-night snack when hunger strikes.
Serve with a side of fresh greens, a drizzle of garlic yogurt, or a sprinkle of za’atar for extra flavor. The possibilities are endless, but the execution is simple. Let’s get started—your morning (or afternoon) just got an upgrade.
Ingredients for egg and pita bread
Four eggs, crispy pita pockets, and bold flavors make this breakfast a crowd-pleaser.
| Ingredient | Amount | Notes |
|---|---|---|
| Large Eggs 🥚 | 4 whole | Room temperature for even cooking |
| Whole Wheat Pita Bread 🍞 | 4 whole | Warm and slightly toasted |
| Unsalted Butter 🧈 | 2 tbsp | Full-fat for crispy texture |
| Extra-Virgin Olive Oil 🫒 | 1 tbsp | For skillet coating |
| Fresh Dill 🌿 | ¼ cup | Chopped, for herb filling |
| Crumbled Feta Cheese 🧀 | ½ cup | Salty variety preferred |
| Garlic Cloves 🧄 | 2 cloves | Minced for flavor base |
| Lemon Juice 🍋 | 1 tbsp | Freshly squeezed |
| Kosher Salt 🧂 | ½ tsp | Diamond Crystal preferred |
| Ground Black Pepper 🌶️ | ¼ tsp | Freshly cracked |
| Plain Greek Yogurt 🥛 | ¼ cup | Full-fat for creaminess |
| Red Bell Pepper 🌶️ | ½ cup | Diced, optional filling |
| Cucumber 🥒 | ½ cup | Seedless, diced |
The pita is the star here—Arabian Oasis or Trader Joe's whole wheat are my go-tos, but any soft pita works. Warm them in a dry skillet for 30 seconds per side before filling, so they stay pliable. Eggs? Room temperature is non-negotiable—cold yolks won't jiggle right. For the feta, Oikos or BelGioioso brands have that perfect crumble without clumping. If you're feeling fancy, toast the pita in the skillet with a pat of butter first—it adds that golden crunch that makes this dish feel restaurant-worthy.
No fresh dill? Dried works at one-third the amount, but honestly, it's worth grabbing a bunch at the market. Feta too salty? Rinse it briefly in cold water and pat dry. Swapping fillings? Spicy hummus or avocado mash are game-changers—just keep the portions light so the egg stays the star. The red bell pepper and cucumber can be raw or quickly sautéed with garlic for extra flavor. Pro tip: Keep the egg yolks runny by removing the pita from the pan just before the whites set completely—you want that perfect wobble.
Make ahead? Assemble the pita pockets with fillings and store in the fridge for up to 4 hours—they'll still get crispy when cooked. The yogurt dressing keeps for 3 days in an airtight container, but the pita loses its magic after that. For a quick breakfast, double the batch and freeze half—reheat in a skillet for 2 minutes per side. The leftovers? Perfect for lunch the next day—just add a sprinkle of za'atar to revive the flavors.
Why You'll Love This Recipe
- Pantry Magic: I swear by this recipe because it uses stuff I always have—eggs, pita, butter, olive oil—no fancy shopping required. The dill adds that fresh kick without needing a whole herb garden.
- Creamy Crisp Contrast: That golden-brown pita crust with the runny yolk inside? It’s the kind of bite that makes you pause mid-bite. Honestly, the butter and olive oil combo keeps it rich but not greasy—just right.
- Lunchbox Hero: Between us, this is my secret weapon for packed lunches. Wrap it up with a smear of hummus or tzatziki, and it stays fresh for days. My kids (and my husband) fight over who gets it first.
- Budget Breakfast: Four eggs, two pitas, and a handful of dill stretch to feed four for under $3. I’ll be real: it’s not the prettiest dish, but the taste makes up for it—and my wallet thanks me every time.
Step-by-step instructions for fluffy yolk-centered pita bites
Here's how to transform simple ingredients into restaurant-quality bites with perfectly runny yolks.
Prepare the Herb-Yogurt Filling
In a small bowl, combine the 0.25 cup plain Greek yogurt, 0.25 cup chopped fresh dill, 0.5 cup crumbled feta cheese, 2 cloves minced garlic, 1 tbsp lemon juice, 0.5 tsp kosher salt, and 0.25 tsp ground black pepper. Mix until fully incorporated and set aside—this tangy, herby filling will keep your bites moist and flavorful.
For extra freshness, I like to add a pinch of ground black pepper right before serving. The yogurt should be full-fat for the best creaminess, and the feta should be salty enough to stand up to the bright lemon and fresh herbs. If using, fold in the 0.5 cup diced red bell pepper and 0.5 cup diced cucumber at this stage for a refreshing crunch.
Toast and Assemble the Pita Cups
Warm the 4 whole wheat pita breads in a dry skillet over medium heat for 1-2 minutes per side until slightly toasted and pliable. Cut each pita into quarters to create small cups—this size works perfectly for bite-sized portions. Arrange the pita quarters in a single layer on a plate, open-side up.
Here's the thing—warm pita is key. Cold pita won't hold its shape when filled, and the texture suffers. If your pita feels too stiff, give it another 10 seconds in the skillet. The slightly toasted edges will add a nice crunch that contrasts beautifully with the creamy filling.
Cook the Eggs to Perfect Runny Yolks
Heat 1 tbsp extra-virgin olive oil and 2 tbsp unsalted butter in a nonstick skillet over medium-low heat until the butter melts and foams. Crack the 4 large eggs into the skillet, spacing them evenly. Let them cook undisturbed for 2-3 minutes until the whites set but the yolks remain completely liquid.
This is where patience pays off. You want the whites just firm enough to hold their shape when you lift them, but still slightly translucent at the edges. If the whites start to brown too quickly, reduce the heat slightly. The butter should create a golden crust around the edges while keeping the yolks silky and runny.
Assemble and Serve Immediately
Carefully transfer each egg to its pita cup using a small spatula. Spoon 1 tablespoon of the herb-yogurt filling over each egg, then top with an extra sprinkle of crumbled feta cheese and a pinch of ground black pepper. Serve immediately while the eggs are still warm and the yolks are perfectly runny.
For the best experience, I recommend serving these with a side of warm pita bread for dipping or a simple cucumber-tomato salad. The contrast between the crispy pita, creamy filling, and perfectly cooked eggs creates a bite that's both satisfying and elegant. Don't forget to keep the eggs covered until serving to maintain their warmth and moisture.
Pro Tips For Making Egg And Pita Bread
- Toast Pita First: Whole wheat pita stays stubbornly chewy when cold. Toss it in a dry skillet over medium heat for 20 seconds per side—just until it’s warm and slightly puffed. This makes the egg stick better and cuts down on soggy bread. (Yes, even if you’re impatient like me, don’t skip this.)
- Crack Eggs Cold: I learned this the hard way—room-temperature eggs slide out of shells messily. Pop ’em straight from the fridge into a bowl, then whisk. The cold eggs emulsify better with the olive oil and butter, giving you a smoother, richer filling. No need to wait 30 minutes; just grab them straight from the fridge.
- Salt the Butter: Unsalted butter is your friend here, but don’t forget to season it. Mix in ¼ teaspoon of salt per tablespoon of butter while melting it—this guarantees flavor, especially if your pita’s whole wheat and slightly bland. (I used to skip this, and the dish always felt flat.)
- Dill at the End: Chop the fresh dill fine and fold it in right before serving. If you mix it into the egg batter too early, it wilts and turns the filling into a sad, watery mess. A handful of bright, chopped dill on top also looks way more appealing. (Sounds weird, but it works—trust me.)
Essential equipment for this recipe
Skillet Essentials
Start with a nonstick skillet—I swear by All-Clad Stainless for even heat distribution and easy release. A 10-inch size works perfectly for this recipe, giving enough room for the eggs and pita without crowding. If you don’t have nonstick, a well-seasoned cast iron like Lodge will work, but you’ll need to use less butter to prevent sticking. 🔥
Pita Prep Tools
Grab a sharp chef’s knife for cutting pita quarters—Wüsthof or Victorinox are my go-tos for clean slices. A small spatula (like OXO Good Grips) helps transfer warm pita without tearing. For extra crispiness, toast the pita in a dry skillet over medium heat—no oil needed here!
Egg Cooking Gear
Use a heatproof spatula (I like Mercer Culinary) to gently lift eggs without breaking yolks. A small mixing bowl for the herb-yogurt filling keeps everything organized. For runny yolks, medium-low heat is key—too hot, and they’ll overcook. A thermometer (like Thermoworks Smoke) ensures your butter stays at 350°F for perfect browning.
Optional Extras
Add a microplane for fresh lemon zest or fine mesh strainer to drain excess moisture from feta. A small bowl for assembling fillings keeps ingredients separate until ready. For serving, a platter and tongs make plating easy—just arrange pita bites in a circle with a drizzle of olive oil for a restaurant-worthy look. ✨
Nutrition facts
Frequently asked questions
Can I make this with store-bought pita?
Any soft pita bread works—whole wheat, white, or even lavash. For best results, warm the pita in a dry skillet for 30 seconds per side before cutting into quarters. This keeps them pliable and prevents tearing when filled. Store-bought pita is perfectly fine, but if you have time, homemade or freshly baked pita will add an extra layer of flavor.
How do I keep the egg yolks perfectly runny?
Use medium-low heat and cook the eggs for only 2-3 minutes—just until the whites are set but the yolks remain liquid. Remove the skillet from heat 30 seconds before the whites are fully opaque, then transfer the eggs to the pita immediately. Overcooking is the #1 mistake—keep an eye on them!
What are good fillings besides feta and herbs?
Try spicy hummus, avocado mash, or smoked salmon for a twist! For vegetarian options, mix in roasted red peppers, spinach, and goat cheese. Keep fillings light so the egg stays the star—aim for 1-2 tablespoons per pita quarter. The yogurt base adds creaminess, so balance it with bold flavors like za'atar or chili flakes.
Can I prep this ahead of time?
Assemble the pita pockets with fillings up to 4 hours ahead and refrigerate. To serve, cook the eggs fresh and place them in the prepped pita. The pita loses crispiness when refrigerated, so always toast it again in a skillet for 1 minute per side before serving. For the yogurt filling, store it separately for up to 3 days in an airtight container.
Why is my pita getting soggy?
Soggy pita usually means the filling is too wet or the pita wasn't toasted enough. Drain excess moisture from ingredients like cucumber or feta, and always warm the pita until crispy before filling. For extra insurance, brush the pita with a tiny bit of olive oil before toasting—this creates a barrier against moisture. Serve immediately after cooking to maintain texture!