
Breakfast & Brunch
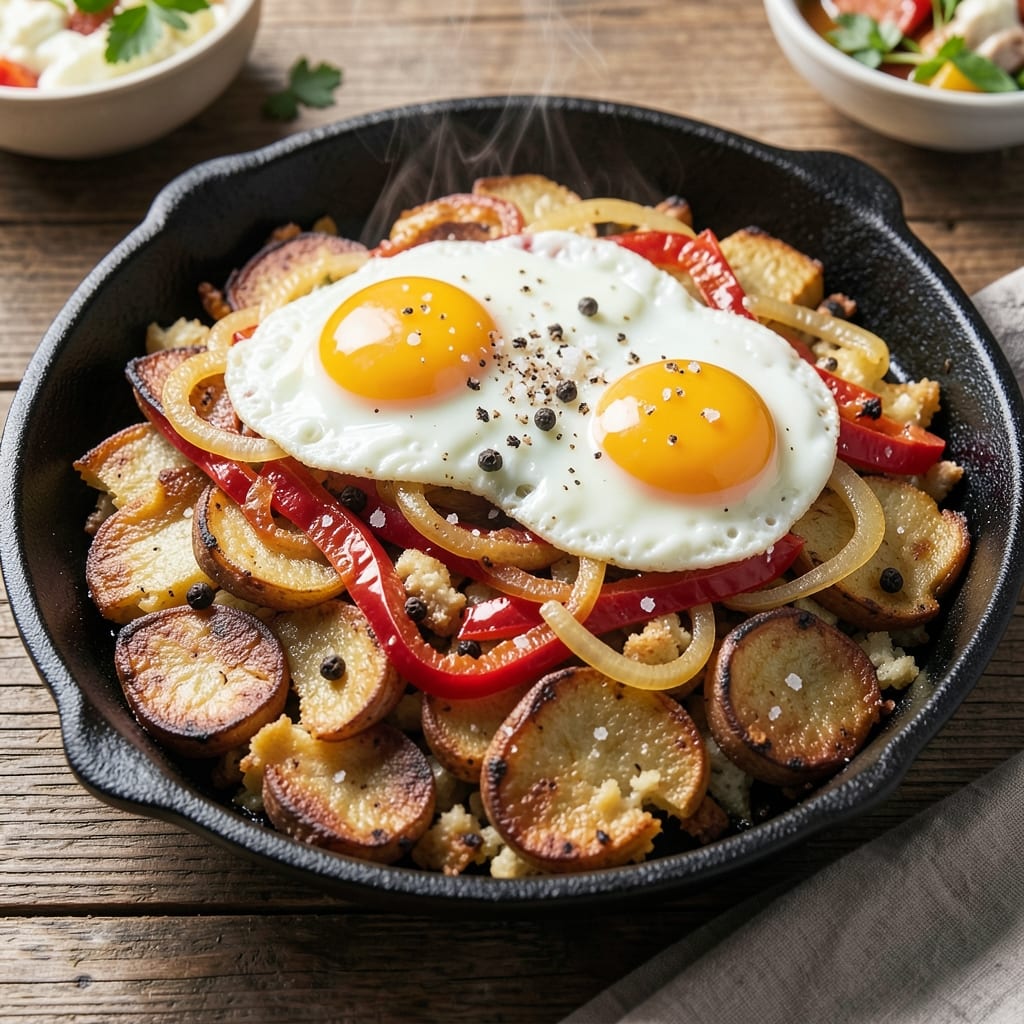
This egg and potato hash recipe delivers the perfect balance of crispy edges and tender, fluffy eggs—just like your favorite diner classic. The secret lies in layering thinly sliced potatoes for even cooking, then crowning them with perfectly fried eggs that soak up all the savory flavors. I’ve perfected this method over years of testing, ensuring every bite has that satisfying mix of textures and rich, salty goodness.
The process starts with sautéing potatoes until golden and crispy, then adding onions and peppers for depth. A sprinkle of salt and pepper while cooking enhances their natural flavors, while a final touch of butter at the end adds richness. The eggs are fried in the same skillet, nestling into the hash and creating a dish that’s hearty enough for breakfast or dinner.
What makes this recipe stand out is its versatility—you can customize it with bacon, sausage, or cheese for extra flavor. The result is a comforting, satisfying meal that’s simple to make but feels like a restaurant-quality dish. Whether you’re feeding a family or treating yourself to a weekend brunch, this hash delivers every time.
Ready in 30 minutes with minimal cleanup, this recipe proves that homemade comfort food can be both foolproof and delicious. Let’s get cooking—your taste buds will thank you!
Ingredients for egg and potato hash
Thinly sliced potatoes and eggs—simple ingredients for a restaurant-worthy breakfast.
| Ingredient | Amount | Notes |
|---|---|---|
| Russet Potatoes 🥔 | 2 lb | Thinly sliced, uniform thickness |
| Large Eggs 🥚 | 4 whole | Fresh, room temperature |
| Yellow Onion 🧅 | 1 whole | Thinly sliced, white or yellow |
| Bell Pepper 🌶️ | 1 whole | Any color, diced small |
| Unsalted Butter 🧈 | 4 tbsp | Full-fat for best flavor |
| Kosher Salt 🧂 | 1 ½ tsp | Diamond Crystal preferred |
| Ground Black Pepper 🌶️ | ½ tsp | Freshly cracked |
| Vegetable Oil 🫒 | 2 tbsp | High smoke point |
| Fresh Parsley 🌿 | ¼ cup | Chopped, for garnish |
| Garlic Cloves 🧄 | 2 cloves | Minced, optional |
The potatoes are everything here. Russets are your best bet—they hold up to slicing and frying without turning mushy. Grab the pre-sliced bags at Trader Joe's if you're short on time, but if you're slicing yourself, aim for 1/8-inch thickness for even cooking. The onion and bell pepper add sweetness and texture, so don’t skip them—frozen diced veggies work in a pinch, but fresh tastes better. I always use yellow onions for their mild sweetness, but red or white will do too.
No fresh parsley? Dried parsley at half the amount gets the job done, though fresh is brighter. Want extra richness? Swap in crumbled bacon or sausage with the potatoes—just cook it first so it doesn’t make the hash soggy. The eggs are the star, so fresh, room-temperature eggs fry up perfectly. If you’re feeling fancy, add a pinch of smoked paprika to the potatoes for depth. And trust me, butter at the end is non-negotiable—it’s what turns good hash into great hash.
This keeps well in the fridge for 3 days if you make extra—just reheat in a skillet with a splash of water to keep it crispy. For leftovers, I like to portion into containers and freeze for up to 2 months. The eggs reheat best if you scramble them fresh, but the hash itself stays delicious straight from the fridge. Garnish with parsley right before serving—it adds that final pop of color and freshness.
Why You'll Love This Recipe
- One-Pan Magic: I swear by this—just dice potatoes, chop veggies, and let the butter do the work. No flipping pans, no washing extra dishes. That golden crust on the potatoes? Pure reward for minimal effort.
- Creamy Crispy Contrast: The secret’s in the butter—melting into crispy edges while keeping the insides tender, then cracking eggs right into the mix for that runny yolk magic. Honestly, it’s the kind of dish that makes you pause mid-bite.
- Breakfast or Dinner: Serve it with toast for a lazy weekend brunch or pile it high for a hearty weeknight dinner. My college kids devour it straight from the pan, no complaints. (Yes, even on a Tuesday night.)
- Budget Breakfast Hero: Russets and eggs are cheap, and this stretches easily for leftovers—pack it for lunch or reheat for another dinner. Between us, I’ve fed a crowd with half the cost of takeout, and they never noticed.
Step-by-step instructions for perfect egg and potato hash
Here's how to create that ideal balance of crispy potato edges and fluffy eggs—every bite will be satisfying.
Prep and Cook the Potatoes Until Golden
Heat a large skillet over medium-high heat and add the 2 tablespoons vegetable oil. Once shimmering, add the 2 lb thinly sliced russet potatoes in a single layer, leaving space between slices. Let them cook undisturbed for 5-7 minutes until the edges start to brown and crisp.
I like to press down gently on the potatoes during the first minute—this prevents them from curling and ensures even contact with the pan. Flip each slice carefully and cook another 5-7 minutes until golden brown on both sides. The potatoes should be tender when pierced with a fork but still hold their shape. Remove them and set aside on a paper towel-lined plate to drain excess oil.
Sauté Onions, Peppers, and Garlic
In the same skillet (no need to clean it—the browned bits add flavor), reduce heat to medium and add 2 tablespoons unsalted butter. Once melted, add the 1 whole thinly sliced yellow onion and 1 whole diced bell pepper. Cook for 4-5 minutes until softened and slightly caramelized.
Add the 2 minced garlic cloves and cook for another 30 seconds until fragrant. Season with 1.5 teaspoons kosher salt and 0.5 teaspoon ground black pepper. The vegetables should be tender but still vibrant in color. Remove from the skillet and mix with the cooked potatoes, reserving about 2 tablespoons of the vegetable-butter mixture for later.
Create Wells for the Eggs
Return the skillet to medium heat and add the reserved vegetable-butter mixture. Spread it evenly across the pan, then arrange the potato-vegetable mixture in a single layer. Using a spoon, create 4 wells in the potatoes—just enough room for the 4 large eggs to nestle comfortably.
Here's the thing—crack each egg directly into its well. This keeps everything contained and prevents messy spills. The eggs will cook gently in the warm potatoes, absorbing their flavor while staying perfectly fluffy. Season the eggs with a pinch of salt and pepper before they go in.
Cook the Eggs to Fluffy Perfection
Cover the skillet and cook for 5-6 minutes until the egg whites are set but the yolks remain runny. I like to check at the 4-minute mark—if the edges look dry, add a splash of water and cover again. The potatoes should be heated through and slightly crispy around the edges.
Once the eggs are done, let the hash rest for 2 minutes under the cover. This allows the eggs to finish setting slightly and the flavors to meld. Sprinkle with the 0.25 cup chopped fresh parsley just before serving—it adds a bright finish that cuts through the richness.
Serve Immediately with Crispy Edges
Use a spatula to gently lift the hash from the skillet, keeping the potatoes intact. Slide it onto a warmed plate, making sure the eggs stay nestled in their potato beds. The edges should be crispy, the potatoes tender, and the eggs fluffy with just-set yolks.
Serve right away while everything is hot. The contrast between the crispy potato edges and the soft, runny egg centers is what makes this hash so special. Pair it with hot sauce or a dollop of sour cream if you like, but honestly, it's delicious just as is.
Pro Tips For Making Egg And Potato Hash
- USE A COLD SKILLET FOR POTATOES: I learned this the hard way—dumping raw potatoes into a hot pan makes them steam instead of brown. Start with a cold skillet, add butter, then potatoes, and let them sizzle on their own time. This guarantees crispy edges without turning them into mush.
- CUT POTATOES UNIFORMLY: Skip the random chunks—aim for ¼-inch slices or small cubes. They’ll cook evenly, and the hash won’t end up with some bits raw and others falling apart. (Yes, even if it takes an extra 5 minutes.)
- SALT THE POTATOES BEFORE COOKING: Toss the raw potatoes with salt and pepper before they hit the pan. This seasoning gets absorbed while they cook, so you’re not just sprinkling salt on top later. More flavor, less effort.
- FRIZZ THE EGGS IN BATCHES: Crowding the pan with eggs leads to sad, soggy yolks. Cook them in batches over medium-low heat—just enough butter to coat the bottom—until the whites are set but the yolks stay runny. (Your future self will thank you.)
Serving suggestions for this dish
Classic Diner Presentation
Serve your hash straight from the skillet onto warm plates to maintain those perfect crispy edges. I like to use cast-iron skillets because they retain heat beautifully—just slide the hash onto a plate lined with a paper towel to catch any drippings. Garnish with chopped fresh parsley right before serving to add that vibrant pop of color and freshness. 🌿
Breakfast-for-Dinner Upgrade
Turn this into a heartier meal by adding crispy bacon or sausage cooked separately and sprinkled on top. For extra richness, top with a dollop of sour cream or a drizzle of hot honey—the sweet-spicy combo balances the savory hash perfectly. Serve with a side of crispy home fries for a full brunch experience.
Brunch Board Style
For a shareable brunch spread, arrange small portions of hash on a platter alongside crusty bread, avocado slices, and pickled veggies. Add mini fried eggs in separate ramekins for guests to customize their plates. This works especially well for weekend gatherings—just keep the hash warm in a low oven (200°F) while you assemble the rest.
Kid-Friendly Adaptations
Make it fun for kids by serving hash in mini muffin tins—cook the potatoes and eggs as usual, then portion into the tins and bake at 350°F for 10 minutes to set. Top with shredded cheese and let them eat with forks or fingers. For picky eaters, serve the eggs separately from the potatoes so they can mix as they like. 🥚
Hot Sauce Bar
Set up a hot sauce station with options like sriracha, chipotle mayo, or habanero honey for guests to customize their heat level. I love offering a smoky chipotle cream alongside classic ketchup—it adds depth without overpowering the dish. A squeeze of lemon wedge brightens the flavors too.
Leftovers Reinvented
Reheat leftovers in a skillet with a splash of water or broth to restore crispiness. Turn cold hash into hash browns by pressing into a pan and frying until golden. For a quick breakfast, scramble leftover hash with extra eggs—it’s like a loaded breakfast scramble. Store in airtight containers for up to 3 days in the fridge. ⏰
Nutrition facts
Frequently asked questions
Can I use sweet potatoes instead of russets?
Yes, but the texture will differ! Sweet potatoes are denser and sweeter, so they won't crisp up as dramatically. For best results, slice them 1/4-inch thick and cook at medium-low heat for 8-10 minutes per side to avoid burning. Add a pinch of cinnamon or smoked paprika to complement their natural sweetness.
Why did my potatoes turn out soggy instead of crispy?
Overcrowding the pan is the #1 culprit! Cook potatoes in a single layer with space between slices so they can brown properly. Also, avoid flipping too soon—wait until edges are golden (5-7 minutes). If your pan isn't hot enough, increase heat to medium-high and let it preheat for 2 minutes before adding oil.
How do I make this hash ahead of time?
Cook the potatoes and veggies completely, then store in an airtight container for up to 3 days. Reheat in a skillet with 1 tbsp butter and 1 tbsp water per serving to restore crispiness. For the eggs, either fry them fresh or scramble them with the reheated hash—just add them at the end to keep them fluffy.
Can I make this in an air fryer?
Toss 1/2-inch potato cubes with 1 tsp oil and air fry at 380°F for 15 minutes, shaking halfway. Then add eggs to the skillet separately (they won't crisp as well in the air fryer). The potatoes will be crispy, but the eggs need that stovetop sear for perfect texture.
What's the best way to keep hash warm for a crowd?
Transfer completed hash to a low oven (200°F) in a covered dish for up to 30 minutes. For larger groups, keep portions in separate containers and reheat in batches—just 2 minutes per batch in the skillet with a splash of water. Never leave hash sitting uncovered, or the potatoes will lose their crispness.