
Breakfast & Brunch
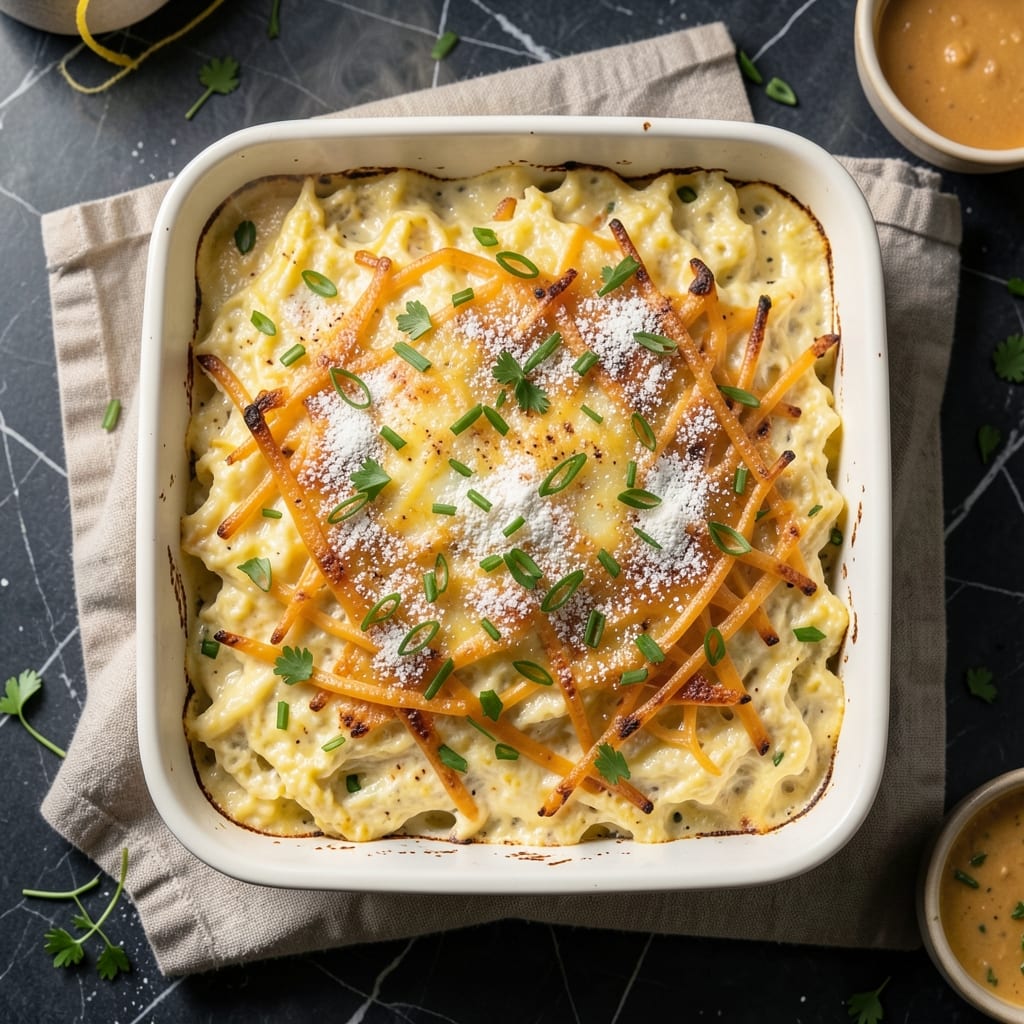
This baked egg scramble casserole recipe transforms breakfast into a hands-off, crowd-pleasing masterpiece with fluffy yolk clouds and a crispy herb-topped crust—no flipping required. 🌟 The secret lies in a simple technique: whisking eggs with cream and cheese until perfectly aerated, then baking until golden. I developed this recipe after years of burning scrambled eggs and finally cracked the code for restaurant-quality results without the fuss.
What sets this dish apart is its versatility—prep the entire casserole in 15 minutes, then bake at 350°F for 20–25 minutes while you handle other morning tasks. The crispy herb topping adds texture and flavor, while the creamy egg mixture delivers that signature fluffy scramble texture in every bite. It reheats beautifully for grab-and-go breakfasts all week.
By the time it emerges from the oven, you’ll have a dish that’s restaurant-quality but made at home—golden edges, tender eggs, and a herbaceous finish that elevates simple ingredients. The best part? It’s foolproof, scalable for crowds, and perfect for meal prep. Here’s how to make it.
Serve with toasted sourdough, fresh fruit, or a side of avocado for a complete breakfast. The crispy herb topping ensures no bite is left without that satisfying crunch. Let’s get started!
Ingredients for baked egg scramble casserole
Restaurant-quality scrambled eggs begin with these 13 ingredients—simple yet precise for perfect texture and flavor.
| Ingredient | Amount | Notes |
|---|---|---|
| Large Eggs 🥚 | 12 whole | Room temperature for even cooking |
| Heavy Cream 🥛 | 1 ½ cups | Full-fat for rich texture |
| Shredded Sharp Cheddar Cheese 🧀 | 2 cups | Aged 6+ months for best flavor |
| Fresh Chives 🌿 | ½ cup | Finely chopped for herb topping |
| Fresh Parsley 🌿 | ¼ cup | Flat-leaf preferred for texture |
| All-Purpose Flour 🌾 | ½ cup | For crispy herb crust |
| Extra-Virgin Olive Oil 🫒 | ¼ cup | Lightly toasted for flavor |
| Diamond Crystal Kosher Salt 🧂 | 1 ½ tsp | Adjust to taste after baking |
| Freshly Ground Black Pepper 🌶️ | ½ tsp | Cracked peppercorns preferred |
| Garlic Cloves 🧄 | 3 cloves | Minced for subtle depth |
| Unsalted Butter 🧈 | 2 tbsp | Melted for crispy topping |
| Sourdough Bread 🍞 | 1 whole | Crust removed, torn into pieces |
| Fresh Thyme Leaves 🌿 | 1 tbsp | For herbaceous finish |
The eggs and heavy cream form the foundation of this dish, so quality matters. Pasture-raised eggs yield richer yolks, while organic heavy cream from brands like Organic Valley ensures optimal fat content for that signature fluffy texture. For the cheese, aged sharp cheddar from Cabot or White Cheddar delivers the best melt and flavor. Fresh herbs should be vibrant—bright green chives and parsley from the grocery store's produce section work fine, but local farmers markets offer superior quality. Store eggs in their original carton in the coldest part of your fridge, and use within 3 weeks for peak freshness.
No heavy cream? Whole milk plus 2 tbsp melted butter replicates the richness. Substitute sharp cheddar with Parmesan or Gruyère for a different flavor profile, though texture may vary. The sourdough bread can be replaced with baguette or Italian bread, but sourdough's tang complements the eggs beautifully. For a gluten-free option, omit the bread and use crushed gluten-free crackers instead. Fresh herbs can be swapped for dried at one-third the amount, though fresh yields superior flavor. The olive oil should be extra-virgin—anything less will lack the fruity notes that elevate this dish.
This casserole reheats beautifully—30 seconds in the microwave restores the crispy topping, while 5 minutes at 350°F brings back that tender egg texture. Store leftovers in an airtight container for up to 4 days, though the herb topping loses crispness after 2 days. For meal prep, assemble the casserole the night before and refrigerate uncovered to develop that perfect crust. Freeze portions for up to 3 months, though texture may slightly degrade. The crispy topping is best when served immediately, so consider making a fresh batch for the best experience.
Why You'll Love This Recipe
- One-Bowl Magic: I swear by this recipe when I’m too tired to chop. Just crack eggs, stir in cream and cheese, toss in herbs—no measuring cups, no fuss. The oven does all the work while I sip coffee.
- Creamy Sharp Cheese Bliss: That sharp cheddar? It’s the star. The heavy cream keeps it luscious, but the cheese melts into golden pockets—salty, tangy, and just crispy at the edges. My kids fight over the last bite.
- Breakfast for Dinner: Honestly, this is my go-to when I’m craving something hearty but don’t want to slave over it. Serve it with toast for brunch, or pile it high for a lazy Sunday supper. The chives and parsley add that fresh kick.
- Leftovers That Don’t Suck: Between us, most egg casseroles dry out by day two. Not this one. The cream keeps it moist, and I reheat slices straight from the fridge—no soggy mess. Plus, it’s cheap enough to make twice.
Step-by-step instructions for baked egg scramble casserole
Here's how to transform simple ingredients into a restaurant-worthy dish with perfect texture and flavor.
👨🍳 Step 1: Prepare the Herb Crust for Maximum Crispiness
Preheat your oven to 375°F. In a small bowl, combine the 0.5 cup all-purpose flour, 1.5 tsp diamond crystal kosher salt, and 0.5 tsp freshly ground black pepper. Add the 0.5 cup fresh chives, 0.25 cup fresh parsley, 1 tbsp fresh thyme leaves, and 3 minced garlic cloves to the flour mixture. Cut the 1 whole sourdough bread into ½-inch cubes and toss them thoroughly with the herb mixture until evenly coated.
Spread the bread cubes in an even layer on a parchment-lined baking sheet. Drizzle with the 0.25 cup extra-virgin olive oil and toss again to distribute evenly. Bake for 15-18 minutes until the bread is golden brown and crispy, stirring once halfway through. The crust should be dry to the touch and maintain its shape when pressed—this ensures it won't turn soggy when we add the egg mixture later.
🍳 Step 2: Whisk Eggs and Cream for Perfect Texture
While the crust bakes, whisk together the 12 whole large eggs and 1.5 cups heavy cream in a large bowl until completely combined. The mixture should be smooth with no visible streaks of egg white. Add the 2 cups shredded sharp cheddar cheese and whisk again until fully incorporated. You want the cheese to melt smoothly into the egg mixture.
Season generously with an additional 1 teaspoon diamond crystal kosher salt and 0.25 tsp freshly ground black pepper—this accounts for the salt already in the crust. Melt the 2 tbsp unsalted butter in a small saucepan over low heat and stir into the egg mixture. The butter will add richness and help create that signature velvety texture. Let the mixture sit at room temperature for 5 minutes before using—this ensures even cooking.
🥘 Step 3: Assemble and Bake the Casserole
Transfer the crispy herb crust to a 9-inch oven-safe skillet or ceramic baking dish. Pour the egg mixture evenly over the crust, spreading it out to cover completely. The mixture should come about ¾ of the way up the sides—this ensures the top cooks properly without overflowing.
Bake at 375°F for 20-25 minutes until the edges are set and the center still has a slight wobble—this indicates the yolks are still slightly undercooked. The top should be light golden brown with a custard-like texture when gently shaken. Here's the thing—don't overbake. The residual heat will continue cooking the center as it rests, and you want those perfect fluffy yolk clouds in the middle.
⏰ Step 4: Rest and Serve for Optimal Texture
Remove the casserole from the oven and let it rest for 5-10 minutes before serving. This resting period allows the heat to distribute evenly and prevents the eggs from continuing to cook too much when sliced. The crust should remain crispy, and the eggs should be just set in the center with those signature soft, creamy yolks.
Slice into 6 equal portions and serve immediately. Each bite should deliver the perfect combination of crispy herb crust, creamy egg custard, and sharp cheddar flavor. If you prefer a warmer serving, you can briefly reheat individual portions in the oven at 350°F for 3-5 minutes, but the texture will be slightly less perfect than when served fresh from the oven.
Pro Tips For Making Baked Egg Scramble Casserole
- Preheat Pan, Then Preheat Oven: I learned this the hard way—skipping the pan preheat makes the eggs cook unevenly. Warm your baking dish (or skillet if starting stovetop) for 2 minutes in the oven at 350°F before adding the egg mixture. The eggs will set more evenly, and the cheese won’t clump like a sad, greasy blob.
- Whisk Eggs Like You Mean It: Heavy cream and eggs need serious love from a whisk. Beat them until the mixture is thick and glossy—no streaks, no lumps. I used to rush this, and the casserole turned out dense instead of light. Take the extra 30 seconds; your future breakfast will be fluffier.
- Skip the Pre-Shredded Cheese: That bagged shredded cheddar? It’s coated in anti-caking agents that make baked dishes grainy. Grate your own cheese—even if it’s a pain—and sprinkle it in layers. The texture will be silky, and the flavor will sing. (Yes, even if you’re impatient like me.)
- Rest Before Serving: This isn’t the prettiest method, but it’s the tastiest. Let the casserole sit covered for 5-10 minutes after baking—it firms up without drying out. I know, I know, you want to dig in immediately, but trust the process. The eggs will hold together better, and the cheese won’t slide off like a guilty secret.
Health benefits of this recipe
Protein Powerhouse
This casserole delivers a whopping 30 grams of high-quality protein per serving—mostly from the 12 large eggs and 2 cups sharp cheddar cheese. Eggs contain all nine essential amino acids, making this dish a complete protein perfect for muscle repair and satiety. The heavy cream adds richness without compromising protein content, unlike watery versions that leave you hungry. 💪
Healthy Fats for Energy
The extra-virgin olive oil and unsalted butter provide heart-healthy monounsaturated fats that support brain function and reduce inflammation. These fats also enhance nutrient absorption from the eggs and cheese. I always use cold-pressed EVOO from brands like California Olive Ranch for maximum flavor and health benefits. The full-fat dairy ensures you get the full spectrum of fat-soluble vitamins like A, D, E, and K2.
Low-Carb Flexibility
With only 6 grams of net carbs per serving (thanks to the minimal bread crust), this casserole fits seamlessly into low-carb or keto diets. The sourdough bread can be reduced to ¼ cup cubes (about 4 grams net carbs) without sacrificing texture. For a fully keto version, replace the bread with crushed pork rinds or almond flour crackers. The eggs and cheese provide all the energy you need without spiking blood sugar.
Vitamin D Boost
Eggs are one of the few natural food sources of vitamin D, with each serving providing about 40 IU (10% of daily value). This nutrient is crucial for bone health, immune function, and mood regulation. I always use pasture-raised eggs from Vital Farms—they contain 3-4 times more vitamin D than conventional eggs due to their access to sunlight. The sharp cheddar also contributes to your calcium intake, making this a powerhouse for bone strength.
Antioxidant-Rich Herbs
The fresh chives, parsley, and thyme in the herb crust aren't just for flavor—they're packed with antioxidants like vitamin C, vitamin K, and flavonoids. These compounds help combat oxidative stress and reduce inflammation. I chop the herbs finely to maximize their surface area, ensuring every bite delivers their health benefits. The garlic adds an extra layer of protection with its allicin compound, known for immune-boosting properties.
Meal Prep Efficiency
This casserole is a nutritional game-changer for busy mornings—it provides balanced macros while saving you time. The protein and healthy fats keep you full for hours, preventing mid-morning energy crashes. I make double batches on Sundays and store portions in glass Pyrex containers for easy grab-and-go breakfasts. The crispy herb topping adds fiber and volume, making it more satisfying than traditional scrambled eggs. 🌟
Nutrition facts
Frequently asked questions
Can I make this casserole ahead of time?
Assemble the casserole the night before and refrigerate uncovered. The crust will develop even more flavor overnight, and the eggs will stay perfectly set when baked. For best results, bake straight from the fridge at 375°F for 25-30 minutes, adding 5 minutes to the original cooking time.
What if my eggs turn out rubbery instead of fluffy?
Overbaking is the most common cause. Remove the casserole when the edges are set but the center still has a slight wobble. Let it rest for 10 minutes before serving—this allows residual heat to finish cooking the center without drying it out. If it's already overdone, try reheating gently in the oven at 300°F for 3-5 minutes with a splash of milk or cream.
Can I use this recipe for a crowd?
Easy! Double or triple the ingredients and use a 9x13-inch baking dish instead of a skillet. For large groups, bake at 350°F for 30-35 minutes (cover with foil if the top browns too quickly). The herb crust can be made in batches—just toast the bread cubes separately and mix with the herb-flour blend before assembling.
What's the best way to reheat leftovers?
For crispy texture, reheat individual portions in the oven at 350°F for 5-7 minutes, covered loosely with foil. Microwave reheating works too: cover with a damp paper towel and heat for 30-45 seconds on 50% power. To revive the crispy topping, sprinkle with a little water and broil for 1-2 minutes at the end.
Can I make this without dairy?
Yes! Replace the heavy cream with full-fat coconut milk and use nutritional yeast or dairy-free cheese instead of cheddar. For the herb crust, use olive oil instead of butter. The texture will be slightly different but still delicious. Keep in mind the protein content will be lower without dairy.