
Breakfast & Brunch
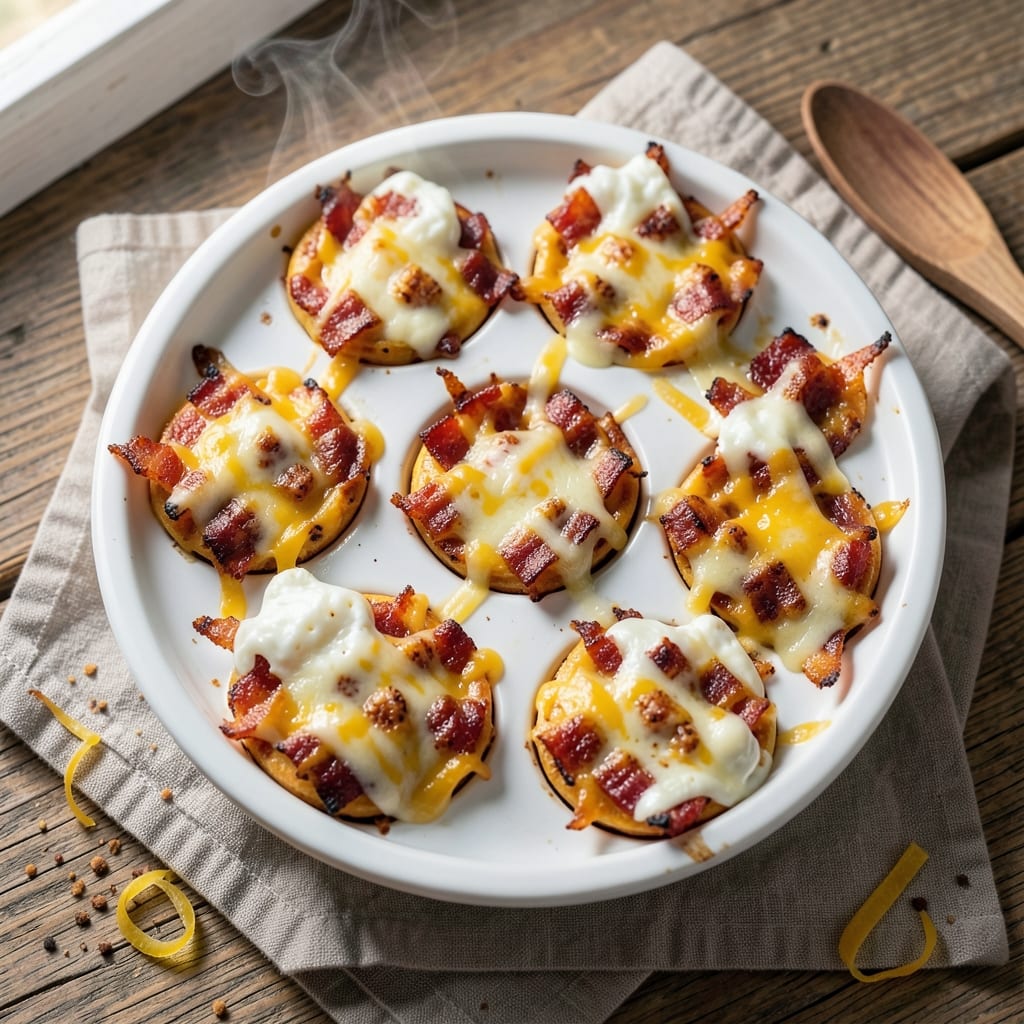
This cheesy bacon egg cups recipe transforms breakfast into a golden, crispy masterpiece hiding gooey cheese and perfectly rendered bacon. The secret lies in baking the eggs in a muffin tin, creating individual cups with edges that crisp up beautifully while the centers stay rich and custardy. I've perfected this technique over countless weekend brunches, and it never fails to impress—even skeptics who think egg cups are too fussy to attempt.
The magic happens when you layer crispy bacon on the bottom of each muffin cup, then pour in a mixture of eggs, shredded cheese, and a touch of cream. Baking at 375°F ensures the edges get beautifully golden while the centers remain tender. The result is a handheld breakfast that's crispy on the outside, creamy on the inside, and packed with savory, salty, and cheesy flavors in every bite. This recipe delivers restaurant-quality results with minimal effort—just 20 minutes of active prep and 15 minutes in the oven.
What makes these egg cups truly special is how they balance textures—crispy bacon, golden crusts, and that melt-in-your-mouth cheese center. They're perfect for feeding a crowd, meal prepping ahead of time, or serving as a brunch centerpiece that looks as impressive as it tastes. The versatility is another plus: swap cheddar for pepper jack, add spinach for extra greens, or top with hot sauce for a spicy kick. Each variation keeps the same foolproof technique while offering endless flavor possibilities.
Serve these cheesy bacon egg cups warm with a side of fresh fruit or a simple green salad for a complete breakfast that feels indulgent yet balanced. The best part? They reheat beautifully, making them ideal for busy mornings or when you need to feed a crowd without spending hours in the kitchen. Let's get started on creating these golden, crispy, cheesy delights that will become your new breakfast staple.
Ingredients for cheesy bacon egg cups
Twelve simple ingredients for crispy, cheesy, bacon-filled breakfast cups that'll fool everyone into thinking they're from a diner.
| Ingredient | Amount | Notes |
|---|---|---|
| Thick-Cut Bacon 🥓 | 12 oz | Cut into small pieces (about 1/4-inch) |
| Large Eggs 🥚 | 8 whole | Room temperature for even cooking |
| Shredded Sharp Cheddar Cheese 🧀 | 2 cups | Freshly shredded, not pre-shredded |
| Heavy Whipping Cream 🥛 | ¼ cup | Full-fat for best texture |
| All-Purpose Flour 🌾 | ¼ cup | For crispy crusts |
| Salt 🧂 | 1 tsp | Kosher or sea salt |
| Black Pepper 🌶️ | ½ tsp | Freshly ground preferred |
| Garlic Powder 🧄 | ½ tsp | For subtle flavor boost |
| Nonstick Cooking Spray 🫒 | 1 tbsp | For greasing muffin tin |
| Butter 🧈 | 1 tbsp | Unsalted, for extra richness |
| Red Pepper Flakes 🌶️ | ¼ tsp | Optional, for spicy kick |
| Fresh Chives 🌿 | 2 tbsp | Chopped, for garnish |
The bacon makes or breaks these—thick-cut is non-negotiable for that perfect crisp. Oscar Mayer or Applegate are my go-tos at the grocery store, but any quality brand works. Cut it small (about 1/4-inch pieces) so it cooks fast and stays crispy. The cheese? Freshly shredded sharp cheddar is key—pre-shredded gets clumpy and melts weird. If you're in a pinch, Kraft 2% Milk Sharp Cheddar from the store works, but it's not the same. And grab the heavy whipping cream—light cream won't give that rich, custardy center.
No thick-cut bacon? Regular bacon cut into smaller pieces works, but it'll be less crispy. Short on cheddar? Pepper jack or Monterey Jack both work—just add a pinch of cayenne for that cheddar kick. The red pepper flakes are totally optional, but they add a nice little heat that balances the richness. Swapping the heavy cream for whole milk? Add an extra tablespoon of butter to keep things creamy. And if you're prepping ahead, make the bacon and cheese mixture first—it keeps well in the fridge for up to 2 days before baking.
These reheat like a dream—30 seconds in the microwave or 5 minutes at 350°F in the oven. I always make a double batch because they disappear fast—freeze extras for up to 3 months. Store them in an airtight container in the fridge for 3 days, but honestly, they're best fresh out of the oven. The chives add a nice pop of color and freshness, but skip 'em if you're short on time. Just don't skip the crispy bacon layer—that's the soul of these egg cups.
Why You'll Love This Recipe
- No-Fuss Mornings: I swear by this when I’m running late—just fry the bacon, mix the eggs with cream and cheese, and pour into muffin tins. No flipping, no waiting, just hands-off baking while I sip coffee.
- Crispy-Creamy Magic: That thick-cut bacon adds salty crunch, while the sharp cheddar melts into a gooey blanket around the fluffy egg center. Honestly, the first bite makes me forget breakfast is supposed to be healthy.
- Lunchbox Hero: Pack these for work or school—they stay warm for hours, and the flour crust keeps everything intact. My kids actually eat their eggs now, which is basically a parenting miracle.
- Budget Breakfast: A dozen cups cost me less than takeout, and the ingredients stretch for days. Freeze extras for lazy mornings or pop them in the oven when you’re too tired to cook.
Step-by-step instructions for cheesy bacon egg cups
Here's how to make these crispy, cheesy egg cups with perfect golden crusts every time.
Cook the Bacon Until Crispy
Preheat your oven to 400°F. Line a baking sheet with parchment paper and arrange the 12 oz thick-cut bacon in a single layer, cutting it into ¼-inch pieces as you go. This ensures even cooking and maximum crispiness.
Bake the bacon for 12-15 minutes until the edges are deep golden brown and the fat has mostly rendered out. Real talk: don't walk away—bacon burns fast once it gets crispy. Transfer the cooked bacon to a paper towel-lined plate to drain excess fat, but leave it warm for the next step.
Prepare the Egg Mixture
In a large bowl, whisk together the 8 whole large eggs, ¼ cup heavy whipping cream, ¼ cup all-purpose flour, 1 teaspoon salt, ½ teaspoon black pepper, ½ teaspoon garlic powder, and ¼ teaspoon red pepper flakes until fully combined. The mixture should be smooth with no visible streaks of flour.
I like to add the bacon pieces to the egg mixture now so they soak up some of the flavors. Give it a gentle stir—just enough to distribute the bacon evenly without breaking it up too much. This step ensures every bite gets that smoky bacon flavor.
Grease the Muffin Tin
Lightly grease a standard 12-cup muffin tin with the 1 tablespoon nonstick cooking spray and 1 tablespoon butter, making sure to coat each cup thoroughly. The spray helps the egg cups release cleanly, while the butter adds extra richness to the crust.
Here's the thing—don't skip the butter. It makes a noticeable difference in how crispy and flavorful those golden crusts become. I use my fingers to rub the grease around each cup, getting into all the crevices. This ensures your egg cups won't stick no matter how crispy you want them.
Fill and Bake the Egg Cups
Divide the egg-bacon mixture evenly among the 12 muffin cups, filling each about ¾ full. Then sprinkle ⅓ cup shredded sharp cheddar cheese into each cup, pressing it down lightly so it peeks through the egg mixture. This creates that beautiful melted cheese effect when they come out of the oven.
Pop the muffin tin into the preheated 400°F oven and bake for 15-18 minutes until the edges are deep golden brown and the centers are just set. You'll know they're ready when a toothpick inserted comes out clean—no raw egg should stick to it. The tops should be puffed and slightly cracked, revealing that gooey cheese underneath.
Garnish and Serve Warm
Remove the egg cups from the oven and let them cool for 2 minutes—just enough to handle them without burning your fingers. Then sprinkle each one with 2 tablespoons chopped fresh chives for a pop of color and freshness.
Serve these immediately while they're still warm and the crusts are at their crispiest. The contrast between the crispy golden crust, creamy egg filling, and melted cheddar is what makes these egg cups so addictive. Pair them with a simple side salad or toast for a complete breakfast.
Pro Tips For Making Cheesy Bacon Egg Cups
- CRISP THE BACON FIRST: Cook the thick-cut bacon until it’s firm and the edges are deep brown—don’t rush this. Cold bacon in the cups will steam instead of crisp, and you’ll end up with soggy bottoms. (I learned this the hard way when I tried to speed up the process.)
- DRIZZLE CREAM LAST: Save the heavy whipping cream for the very end—right after baking. If you add it to the egg mixture too early, the heat will turn it greasy instead of creamy. A quick drizzle after baking keeps it luscious and silky.
- PRESS CHEESE DOWN: Don’t just sprinkle the shredded cheddar—pack it firmly into the cups. This guarantees a thick, gooey layer instead of a sad, thin dusting. Use the back of a spoon if you’re lazy, but press it in.
- USE ROOM-TEMP EGGS: Cold eggs from the fridge will sink to the bottom and cook unevenly, often leaving raw centers. Let them sit out for 10 minutes before cracking—this makes all the difference for even, fluffy results. (Yes, even if you’re impatient like me.)
Storing and reheating this dish
Refrigerator Storage
Store your cheesy bacon egg cups in an airtight container (I love Rubbermaid Brilliance containers) for up to 3 days in the fridge. Let them cool completely before storing to prevent condensation, which can make the crusts soggy. I always arrange them in a single layer to maintain their shape, and cover them with a paper towel to absorb any excess moisture. 🥗
Freezer Prep
For longer storage, freeze them for up to 3 months—just bake them straight from frozen at 375°F for an extra 5-7 minutes (cover with foil if they brown too fast). I recommend using quart-sized freezer bags with the air squeezed out to prevent freezer burn. Label them with the date so you can track freshness. Thaw overnight in the fridge before reheating.
Reheating Methods
Microwave method: Pop 1-2 cups on a microwave-safe plate, cover with a damp paper towel, and heat at 70% power for 45-60 seconds. This keeps the cheese gooey without drying out the crust. Oven method: Bake at 350°F for 10-12 minutes covered with foil, then uncover for the last 2 minutes to crisp the tops. The oven method is my favorite for maintaining texture.
Make-Ahead Tips
Prep the bacon and cheese mixture ahead of time—it stays fresh in the fridge for 2 days before baking. I also like to assemble the egg cups in the muffin tin and refrigerate them overnight, then bake straight from cold in the morning. This saves time on busy mornings and ensures you're never scrambling to make breakfast. The flavors actually deepen after overnight chilling! 💡
Serving Warm
These egg cups are best served fresh out of the oven, but if reheating, always serve with a side of hot sauce or sour cream to cut through the richness. I love pairing them with a simple spinach salad or crusty toast to balance the meal. For brunch parties, arrange them on a wooden board with fresh chives sprinkled on top—they look as good as they taste! 🍽️
Nutrition facts
Frequently asked questions
Can I make these egg cups without a muffin tin?
Use a 12-cup silicone muffin mold or even a mini cast-iron skillet for a stovetop version. For the skillet method, heat it over medium-low heat, grease well, and pour the egg mixture into small wells. Cover and cook for 8-10 minutes, stirring gently once. The texture will be slightly different but still delicious.
What's the secret to getting perfectly golden crusts?
The golden crusts come from three key steps: greasing with butter + cooking spray, baking at 400°F, and not overfilling the muffin cups. The butter adds richness that helps caramelize, while the high heat creates that beautiful Maillard reaction. Fill cups only ¾ full so they can puff up properly.
Can I add other ingredients like spinach or sausage?
Yes! Add 1 cup chopped spinach to the egg mixture (it wilts down) or swap half the bacon for ½ lb cooked sausage. For veggie options, try diced bell peppers or mushrooms. Just be mindful of moisture—spinach adds liquid, so you might need to reduce the cream slightly to 2 tablespoons instead of ¼ cup.
Why did my egg cups come out rubbery instead of creamy?
Rubbery texture usually means the eggs were overcooked. Check your baking time—15-18 minutes at 400°F is perfect. Overbaking dries out the centers. Also ensure your eggs were room temperature (cold eggs take longer to cook evenly). For extra creaminess, add 1 tablespoon milk or cream to the egg mixture.
How do I make these egg cups ahead for a brunch party?
Assemble the egg cups in the muffin tin and refrigerate overnight. Bake straight from cold at 400°F for 20-22 minutes (they'll need the extra time). For a crowd, bake 2 batches and keep them warm in a 200°F oven on a wire rack. Serve with a side of hot sauce or sour cream for dipping!